You're standing at the bottom of a tired exterior stair, looking at a rail that was probably added after the concrete was poured, or never added at all. The steps may be cracked, the top landing might lean a bit, and the nearest kit at the hardware store looks straight enough until you try to imagine it following the slope in front of your door. That's where custom handrails for outdoor steps stop being a design choice and become the practical way to make an aging entry safe, usable, and code-aware.
Table of Contents
- Why Custom Handrails Are Usually the Right Call for Outdoor Steps
- Measuring the Stair the Way a Fabricator Will Measure It
- Code Clearances and Grip Dimensions That Shape the Design
- Choosing a Metal That Survives Montreal Winters
- Mounting Options for Concrete, Masonry, and Existing Stairs
- Working With a Fabricator From Quote to Install
- Pre-Fabrication Checklist You Can Hand to Your Contractor
Why Custom Handrails Are Usually the Right Call for Outdoor Steps
A property manager once pointed at a stoop and said, “That rail was fine when the building was new.” The problem was obvious before anyone touched a tape measure. The concrete had shifted, the top step had a slight twist, and the rail line no longer matched the stair line in a way an inspector would ignore.
Why kits look fine in the box and wrong on site
Off-the-shelf railing kits assume clean geometry. Real exterior stairs rarely give you that. A sloped nosing, a landing that is a little out of square, or a missing stringer face can make a standard rail look forced. On older stairs, it can also leave bracket holes where the structure is not strong enough to trust.
The code side matters just as much as the fit. Exterior handrail rules are tied to riser count, grasp height, and whether the stair is serving a private entry or a public route. For a code-focused reference on those requirements, the building guidance at exterior stair railing code requirements is useful because it shows how quickly a simple stair turns into a layout problem once clearances and height limits come into play.
A rail that looks simple from the street can still fail at the mount points, the grip shape, or the clearance at the top step.
That is why the first conversation with a shop should be about the stair itself, not the finish colour. If the rail has to clear a landing edge, avoid a cracked concrete corner, or tie into a wall return, the shape of the stair is the primary consideration. I also tell owners to look at the stair as a site condition, not a catalog order, because aging exterior steps in Greater Montreal rarely stay square, dry, or level for long. Freeze-thaw cycles, salt, and patchwork repairs change the substrate, which is where custom fabrication starts paying for itself.
Steel, stainless, and aluminum each solve a different problem. Steel gives you stiffness and a familiar fabrication process, but it needs the right coating and honest maintenance. Stainless costs more up front, yet it makes sense where corrosion is the bigger risk than weight. Aluminum is light and easy to handle on site, although it can feel less substantial on long runs and may need more careful detailing at the anchors. A custom rail lets me match the material to the stair, the exposure, and the mounting surface instead of forcing the stair to accept a kit that only fits in theory.
Manara Corp often gets called in after a failed retrofit, when the old holes are already in the wrong place and the prefabricated section cannot be made to sit level without shims and compromise. That is usually the point where custom work stops being a luxury and starts being the cleaner fix. You get a handrail that follows the actual stair, clears the actual obstructions, and leaves room for code-compliant grip and mount details without fighting the site.
Measuring the Stair the Way a Fabricator Will Measure It
A proper site survey starts with the stair as it exists, not as you wish it had been built. The most useful note I can give a homeowner or site supervisor is to measure the stair the way the rail will live on it, nose to nose, not just wall to wall.
Start with the run, the rise, and the nosing
Measure the total run from the first nosing to the last nosing, because that is the horizontal distance the rail has to cover. Then record each tread depth, each riser height, and any nosing projection that changes where the hand lands relative to the edge. If the stair has one uneven step, write that down separately instead of averaging it away.
For outdoor rails built around 1 to 2 steps, product specs in the market often use 0 to 90° adjustability, 9 mm pre-drilled fixation holes, and 50 mm stainless tubing with up to 200 kg load capacity, while rails for 2 to 3 steps are often sold around 106 cm wide by 86 cm high with 0 to 45° angle adjustment Vevor step handrail specs. Those numbers matter because they show how quickly a “standard” rail runs out of tolerance when the stair is irregular.
Photograph what the tape can't explain
Take each photo from the angle a fabricator would need to judge it. One shot straight on, one from the side, and one close-up of the substrate at every proposed anchor point. If the top step is sloped, the landing is out of square, or the concrete edge is cracked, show that clearly. Shops that do custom work often rely on photos and measurements to decide feasibility before they cut anything, especially when the stairs are in another city or partially obstructed Eichenwald custom fabrication notes.
Practical rule: if you can't point to the exact spot where a bracket will land, the shop can't price the job cleanly.
For a clean handoff, send the fabricator a simple sheet with the stair count, run, rise, substrate type, and clear photos. If you're working with a local metal shop, the stair details on Manara's stair fabrication page are the kind of information set that lets a quote move fast instead of bouncing back for more site data.
Code Clearances and Grip Dimensions That Shape the Design
A rail can look right on paper and still fail at the curb if the clearances are off. On older exterior stairs in Greater Montreal, I measure first for fit, then for grip, because a winter rail has to work with gloves, slush, and uneven footing. Code drives the layout, and the layout decides what can be fabricated without trouble.
Handrail grip, height, and the second rail question
Canadian accessibility handrailing guidance gives a practical starting point, even on steps that are not part of a fully accessible route. For outdoor step handrails, a finished top-rail height of about 900 to 1100 mm above the pitch line is the usual target, with a preferred circular grip diameter of 40 to 50 mm. Where children or shorter users are part of the picture, a second lower rail at 600 to 700 mm can make the rail easier to use, and a non-reflective contrasting finish helps the edge read clearly in low light Canadian handrailing guidance.
That grip range matches what a hand can hold securely in wet or gloved conditions. Oversized tube, decorative scrollwork, or square bar can look good on a drawing and still feel awkward once someone is coming down icy steps. A rail that gets used all winter has to fit the hand before it impresses the eye.
Handrail versus guardrail is not a cosmetic distinction
A lot of outdoor stair jobs need both, even when the owner asked for only “a rail.” A narrow stoop with solid edges may only call for a handrail, but the same stoop with an open side now needs guard protection on the fall side. A small change in the stair layout can change the edge condition enough that the fabrication details have to change too.
Design takeaway: if the stair has an open side, ask whether the edge needs guard protection as well as a handrail.
That review matters even more on public and commercial work, where clearances and protection requirements are usually taken more seriously. A careful code check before fabrication avoids cutting anchors, brackets, and posts twice, and the Canada mortgage and housing material on Canadian handrail and guardrail guidance is the kind of reference that helps a shop keep the details aligned before metal is bent. It is far cheaper to redraw a rail on paper than to pull anchors out of concrete.
Choosing a Metal That Survives Montreal Winters
Montreal exterior stairs punish weak finishes. Freeze-thaw movement, de-icing residue, and repeated moisture exposure expose every bad weld, thin coating, and sloppy drain path. The material choice is not just about appearance, it's about how often the owner wants to touch the rail again.
| Material | Typical cost per linear foot (USD) | Winter / salt performance | Maintenance cycle |
|---|---|---|---|
| Vinyl | $25 to $60 | Lower durability in harsh exterior conditions | Lower upkeep, but more limited toughness |
| Wood | $25 to $60 | Vulnerable to moisture and weathering | Sealing or replacement as wear appears |
| Wrought iron | More than $100 to $200 | Strong, but finish protection matters a lot | Periodic repainting or refinishing |
| Cable | More than $100 to $200 | Good structure, but detailing must be precise | Hardware checks and inspection |
| Fibreglass | More than $100 to $200 | Useful in some settings, but less common for stair fabrication | Maintenance depends on system |
| Steel or aluminium custom work | Often chosen for exposed exterior use | Durable when properly detailed and finished | Lower visible wear when fabrication is done right |
The installed outdoor handrail market data used by contractors puts average outdoor handrails at about $80 per linear foot, with a common range of $50 to $230 per foot depending on material. A five-foot railing is estimated at about $700 on average, while custom wrought-iron, cable, or fibreglass sections can rise to roughly $1,150 for the same length Angi outdoor handrail pricing. That spread explains why buyers often start with price and end up choosing durability once the project has to survive real weather.
What pays back over time
A raw or painted carbon-steel rail can be the lowest barrier to entry, but on a winter stair it's the one most likely to demand repainting and repair attention later. Stainless steel carries a higher upfront cost, yet its exterior weather resistance and lower maintenance load are the point. Aluminium is lighter and naturally corrosion-resistant, which makes it attractive where the structure or installation path favours a lighter section.
For custom railing work in Montreal, the practical middle ground is usually a metal system that can be cut, bent, and welded to suit the stair, then finished to match the exposure level. Manara Corp's railings division is one example of a shop that handles custom metal railing services alongside other fabricated components, which matters when a stair rail needs to match a fence, landing frame, or adjacent metalwork.
If the owner plans to stay in the property, the cheapest rail on day one is rarely the cheapest rail over the life of the stair.
Mounting Options for Concrete, Masonry, and Existing Stairs
The attachment point decides whether the rail stays serviceable or turns into a repair job. A clean-looking handrail with a weak anchor does not hold up on older Montreal steps, especially where concrete has already cracked, been patched, or settled out of level after years of freeze-thaw cycles.
Match the mount to the structure
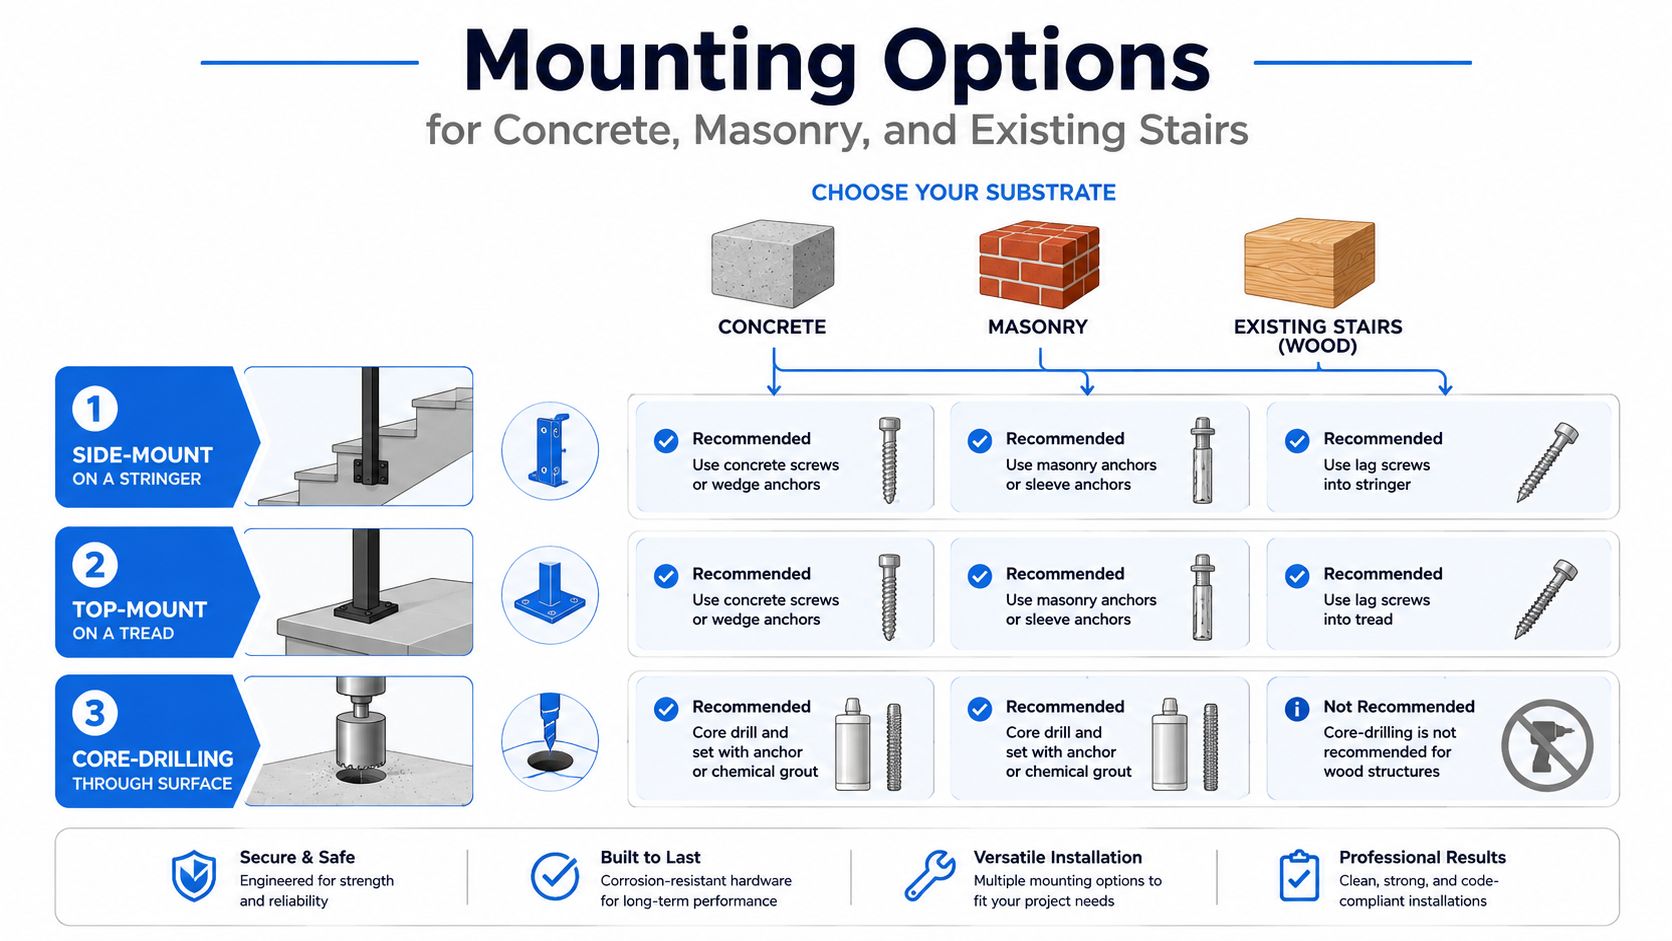
Side-mount fits where there is a solid stringer face, stair wall, or edge beam that can take the load. It keeps the rail off the tread surface and usually looks cleaner, but only if the structure behind it is sound enough to carry the forces from daily use.
Top-mount is common on concrete treads or landings, because the base plate sits directly on the step surface. It is straightforward when the concrete is healthy and level, but it gets awkward fast if the edge is spalled or the tread falls away from the bracket.
Face-mount works when a wall or landing edge is the only practical anchor zone. It is useful in tight spaces, though it demands careful checking of the substrate, because a masonry face that looks solid can still be too friable for a reliable anchor.
Cracked concrete does not automatically kill a project. It means the anchoring plan has to be based on what the stair can safely hold, not on a generic bracket layout.
What to photograph before a shop visit
- Cracks and spalls: Show any broken edges where a base plate might sit.
- Slope and twist: Photograph the top step, landing, and any visible out-of-level surface.
- Material transitions: Note where concrete meets brick, block, or framed construction.
- Hidden access issues: Show rail sides near doors, downspouts, or trim that might block drilling or wrench clearance.
- Existing fasteners: Capture any old anchors, failed rails, or patched holes.
Older exterior stairs often force a different approach than a new-build detail. If the surface is too irregular for standard anchoring, the shop may need to change base plate size, bracket spacing, or post location rather than force a layout that only works on paper. A fabricator's retrofit guidance from custom fabricators is useful here, especially when the question is whether the stair can accept a new rail without turning the concrete or masonry into a larger repair.
For owners comparing attachment methods on concrete, masonry, and wood stair surfaces, this mounting chart shows the basic options side by side.
Working With a Fabricator From Quote to Install
A usable quote starts with a real site picture, not a request for “a rail on the front steps.” On older exterior stairs in Greater Montreal, the details that matter are usually the ones clients overlook at first, the actual rise and run, the condition of the concrete or masonry, the wall clearances near the steps, and whether winter heave or past patchwork has changed the geometry.
What a shop needs to price the job cleanly
The first package should include the stair count, run, rise, and the likely mount style. Add straight-on photos from the same angle each time, because that makes bracket clearance and edge conditions easier to read without another visit. If the rail needs a landing return, a wall tie-in, or a transition to another metal feature, sketch that too. That gives the shop enough to separate a clean fabrication from a job that will need on-site problem solving.
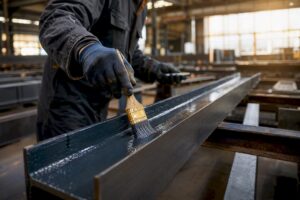
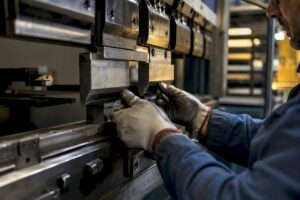
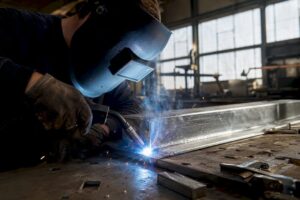
The fabrication setup matters as well. Manara Corp operates a 5 x 10 working area that accommodates large sheets and efficient part nesting, uses a fiber laser with nitrogen assist to minimise heat-affected discoloration on cut edges, and runs CNC equipment across cutting, press brake forming, and shearing to support repeatable results on custom metalwork including railings, stairs, and fences Manara Corp. That kind of setup helps when a stair rail has to match the measured angles instead of being forced into a stock pattern. A shop that also handles the forming in-house can keep the bends, brackets, and post positions aligned more tightly from the first cut to the final fit.
What usually belongs in the quote
A solid quote should spell out the material, finish, anchor hardware, and any coating or surface treatment. It should also show whether the price assumes standard access or a harder delivery path, because a site without loading-dock access, a narrow side yard, or an enclosed front walk can change the install day. If those conditions are left out, the final number can shift after the first site walk, and that is the point where friction usually starts.
Steel, stainless, and aluminium each bring a different trade-off. Steel gives a strong, familiar structure, but it depends on proper coating and maintenance. Stainless costs more up front, yet it handles exposed outdoor conditions with less attention. Aluminium stays light and resists corrosion well, but it is not the right answer for every span, especially where the design needs a stiffer feel or a heavier visual match to the rest of the exterior.
The internal forming side matters too. If a shop is also handling bends or brackets in-house, sheet bending and rolling capability can reduce handoffs and keep the rail geometry consistent from one part to the next. That matters most on custom exterior stairs where the rail has to clear existing concrete, landings, and trim without forcing a field fix.
Ask for the quote in writing, with the mounting assumption stated plainly. Clients often overlook that line item until installation day.
Pre-Fabrication Checklist You Can Hand to Your Contractor
Keep this as a one-page handoff, or screenshot it and send it with the photos.
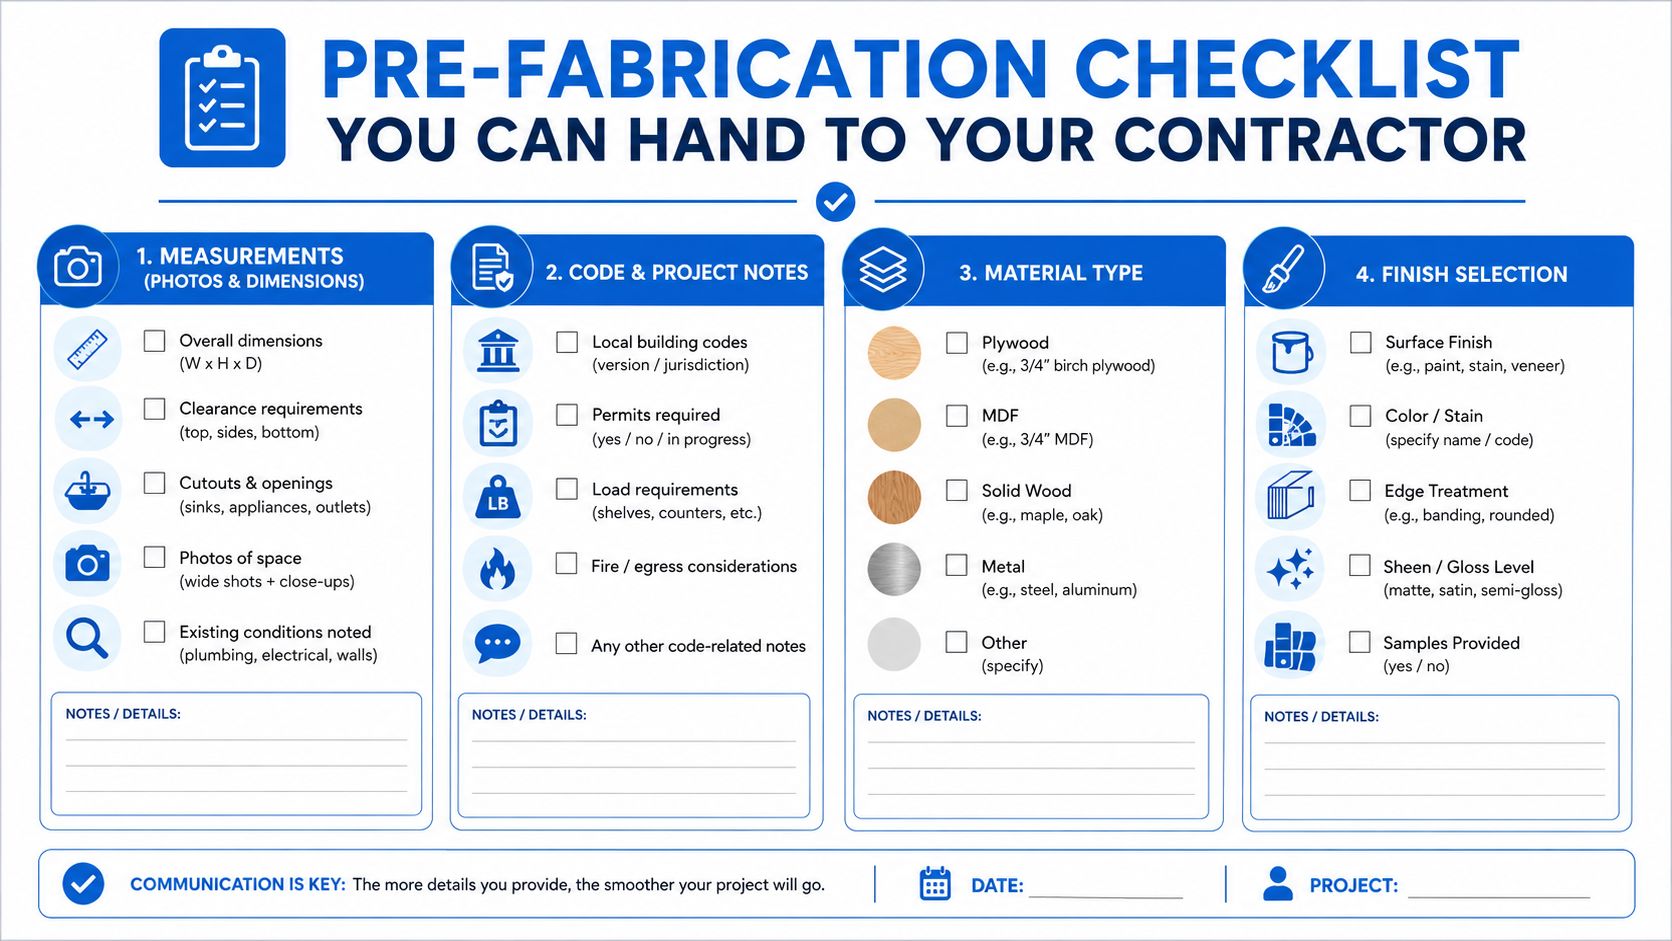
- Measurements: Stair count, total run, rise, tread depth, nosing projection, landing width.
- Photos: Straight-on shots of the stair, side views, close-ups of every proposed anchor point.
- Code notes: Handrail needed, guardrail needed, open-sided conditions, landing issues.
- Material choice: Steel, stainless, aluminium, or another specified metal.
- Finish choice: Painted, powder-coated, brushed, or other agreed finish.
- Mounting style: Side-mount, top-mount, face-mount, or a retrofit solution.
- Site conditions: Cracks, slope, spalling, obstructions, and access limits.
- Shop request: Confirm fabrication, hardware, delivery, and installation assumptions in writing.
The point of all this planning isn't bureaucracy. It's a rail that fits the first time, clears inspection without drama, and keeps doing its job through years of Montreal winters. If you're planning a stair upgrade, contact Manara Corp to discuss custom handrails for outdoor steps, share your measurements and photos, and get a fabrication plan built around the site you have.
Authored using the Outrank tool