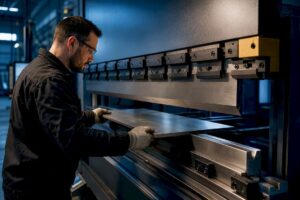
Most fabricators are better served by modular European or WILA-style tooling, since it swaps fast and handles a wide mix of jobs without a full tool change. Reserve American-style tooling for heavy plate work and long, repetitive runs where rigidity matters more than flexibility. Before you order anything, run three checks: confirm your machine’s clamping standard, measure your available daylight and tool height, and size the V-die opening at roughly 8 times material thickness as a starting point.
- Modular/WILA style for high-mix, quick-change shops
- American style for heavy-gauge, high-volume, repetitive bending
- Rule-of-thumb: V-opening ≈ 8× sheet thickness, adjusted 6 to 10× for exceptions
- Always verify clamping compatibility and daylight before purchase
Key Takeaways
Picking the right press brake tooling comes down to matching clamping standard, V-opening, and material hardness to the specific job, not defaulting to whatever is already in the rack.
| Point | Details |
|---|---|
| Match tooling style to job mix | Modular European/WILA tooling suits high-mix shops; American style suits heavy, repetitive plate work. |
| Apply the rule-of-8 carefully | Size V-opening at roughly 8 times material thickness, adjusting between 6 and 10 times for exceptions. |
| Budget for total cost, not sticker price | Standard punches run in the low hundreds; hardened and custom sets run into the thousands but cut changeover time. |
| Maintain tooling on a daily habit | Cleaning, light lubrication, and visual checks each shift prevent most angle drift and marking problems. |
| Manara Corp offers trial bends and custom dies | Local consultation and in-shop trial runs help confirm tooling fit before a production commitment. |
Table of Contents
- What is press brake tooling and what types will you use daily?
- How do European, American, and WILA tooling standards compare?
- What is the rule of 8 for sizing press brake dies?
- Which tooling materials and hardness suit your material?
- What does press brake tooling cost, and how should you budget?
- How do you maintain tooling and catch problems early?
- When should you use software instead of shop rules-of-thumb?
- How do you choose the right tooling for a specific job?
- How long does press brake tooling last before it wears out?
- How does tooling geometry affect bend quality?
- When do custom or specialty dies make sense?
- What safety steps matter when changing press brake tooling?
- Is coated or advanced tooling worth it over standard tooling?
- What Manara Corp. looks for when tooling decisions get complicated
- Get a tooling consultation and trial bends from Manara Corp.
- Manufacturer pages and technical guides to confirm specs
- Sources
- FAQ
What is press brake tooling and what types will you use daily?
Press brake tooling splits into two families: upper tools (punches) that mount in the ram, and lower tools (dies) that sit in the bed. Clamping components, whether American wedge clamps, European hook clamps, or hydraulic quick-clamps, hold everything in place and determine what tooling fits your machine at all.
On the punch side, you’ll cycle through a handful of shapes constantly:
- Standard 90° punches for basic right-angle bends
- Gooseneck punches for deep box sections where you need clearance past the flange
- Acute punches for angles tighter than 90°
- Radius punches for large-radius, crack-resistant bends
- Hemming and flattening punches for folding material flat against itself
Dies mirror that variety. Single-V dies handle one job well; multi-V dies pack several groove widths into one bar so you rotate instead of swap. Radius dies and hemming/flattening dies round out the set for specialty forming work, and each combination changes both your bend radius and the tonnage the press has to deliver.
How do European, American, and WILA tooling standards compare?
Tooling standards aren’t interchangeable, and mismatched tang widths or clamping geometry will stop a job cold. European (Promecam-style) tooling typically uses a narrower tang and segmented dies, favouring quick-change flexibility. American tooling tends toward one-piece dies with wider tangs built for brute durability on thick plate. WILA and Trumpf systems add their own clamping and safety-lock features, often with hydraulic quick-clamps that cut changeover time dramatically.
Before ordering, confirm:
- Your press brake’s clamping system (American wedge, European hook, WILA/Trumpf hydraulic)
- Tang width and tool height match your machine’s specifications
- Locating grooves or safety features align with your ram and bed
- Whether segmented or one-piece dies suit your job mix
Guessing here is the fastest way to receive tooling that looks right and doesn’t fit.
What is the rule of 8 for sizing press brake dies?
The rule of 8 is the shop-floor shortcut for choosing V-die opening in air bending: multiply your material thickness by roughly 8 to get a starting V-width. A 3 mm sheet points you toward a 24 mm opening. It’s not gospel. Shops routinely work within a 6 to 10 times range depending on material and bend geometry.
The math that matters: a narrower V-opening improves angle accuracy and control but drives tonnage up sharply. Widen the V and tonnage per foot drops, but you sacrifice precision on the bend angle and increase the minimum flange length you can form.
Watch for these exceptions:
- Short flanges that won’t clear a wide V-opening
- High-strength or advanced high-strength steel, which cracks more readily at tight radii
- Very tight internal radii that call for a narrower die than the rule suggests
- Any job where the tonnage math gets close to your machine’s rated capacity, which is when you should switch to tonnage tables or brake software instead of mental math
Which tooling materials and hardness suit your material?
Match tool steel to workpiece, not the other way around. 42CrMo, Cr12MoV (SKD11), and H13 are the workhorses of the industry, and each takes heat treatment differently to reach the hardness levels that resist wear in high-volume production. Carbide-tipped tooling sits above all three for extreme wear resistance, usually reserved for the highest-volume, most abrasive jobs where regular steel wears out fast.
- For stainless and aluminum surfaces that mark easily, polyurethane dies or rolling-bearing tooling prevent scuffing without leaving witness marks
- For general mild steel, hardened 42CrMo or H13 punches and dies balance cost against service life
- For abrasive high-strength alloys in long runs, carbide tips pay for themselves in reduced downtime
Regrinding restores an edge, but only within limits. Once a punch or die has been reground past its safe height tolerance, replace it. Continuing to regrind a tool that’s lost too much material changes your V-opening geometry without you realizing it, and that shows up as inconsistent bend angles across a job.
What does press brake tooling cost, and how should you budget?
Tooling is a capital purchase, not a consumable, and the price range reflects that. Entry-level standard punches and dies run in the low hundreds of dollars per piece. Hardened precision sets and carbide-tipped options climb into the thousands. Fully custom dies for a repeat part often cost more again, but they’re a one-time spend that keeps paying off every time that part runs.
Look past sticker price to total cost of ownership:
- Changeover time: segmented, quick-clamp tooling cuts setup dramatically for high-mix shops
- Service life: how many cycles before regrind, and how many regrinds before replacement
- Scrap impact: the wrong tooling on a tight-tolerance job generates more rejects than the tooling itself ever cost
Segmented quick-change tooling earns its premium in job shops running dozens of different parts a week. Custom dies earn theirs when one part runs often enough that the setup savings outweigh the upfront cost. There’s rarely a middle ground worth paying for.
How do you maintain tooling and catch problems early?
A quick daily habit prevents most tooling failures. Wipe contact surfaces clean, apply a light lubrication film, and eyeball punches and dies for nicks or height changes before the shift starts. Structured maintenance programs measurably extend service life and cut down on cracking, angle drift, and surface marking.
| Symptom | Likely Cause | Remedy |
|---|---|---|
| Angle drift across the bend length | Worn die or crowning issue | Check bed crowning, regrind die if worn |
| Surface marking on finished parts | Contaminated or damaged tooling surface | Clean contact faces, switch to non-marking die |
| Cracking at the bend | Wrong V-opening for material or grain direction | Widen V-opening, check material grade |
| Inconsistent bend angle between parts | Tooling not seated or clamp worn | Reseat tooling, inspect clamping hardware |
Store punches and dies in a dedicated rack, not stacked loose, since edge-to-edge contact is what causes most of the nicks you’ll be troubleshooting next week.
When should you use software instead of shop rules-of-thumb?
Rules like the rule-of-8 are fast and reliable for straightforward jobs, but complex parts change the math. Modern bending software can handle die selection, tonnage calculation, bend sequencing, and crash-avoidance checks in one pass, turning tooling choice into a data-driven step instead of a guess.
- Die selection tools cross-reference material, thickness, and geometry against your tooling library
- Tonnage calculators flag when a job is close to your machine’s rated capacity
- Sequencing software catches part-to-tool crashes before you’re mid-bend on the shop floor
The productivity gain is real: fewer trial bends, faster setup, and fewer scrapped parts on first-run jobs.
Pro Tip: Use software for anything with multiple bends, tight tolerances, or high tonnage. Save the mental rule-of-8 math for the quick, simple jobs where firing up a program would take longer than the bend itself.
How do you choose the right tooling for a specific job?
- Check your machine first. Confirm clamping standard, available daylight, bed crowning, and backgauge capability before you even look at a catalogue.
- Define the part. Note material type and thickness, minimum flange length, inside radius, and any finish requirements like non-marking surfaces.
- Pick geometry and verify tonnage. Choose punch shape, calculate V-opening with the rule-of-8, confirm tonnage against your machine’s rated capacity, and decide between segmented or one-piece dies.
- Interrogate the supplier. Ask about hardness (HRC), regrind policy, lead time, and confirmed compatibility with your press.
Pro Tip: A supplier who can’t quote you an HRC range or a regrind policy off the top of their head hasn’t sold much tooling. Treat vague answers on either question as a red flag before you place the order.
Watch for suppliers who won’t confirm tang dimensions in writing, or who quote a V-opening without asking your material grade first.
How long does press brake tooling last before it wears out?
Tooling life depends heavily on material, hardness, and how the shop treats it, but there are consistent early warning signs across every tool steel grade. The first indicator is almost always angle drift, meaning parts that bent cleanly at 90 degrees start coming out a degree or two off, usually because the die edge has rounded from repeated contact.
Surface condition tells the second story. A punch nose or die edge that’s picked up nicks, galling, or visible wear lines will start transferring those imperfections onto every part it touches, especially on brushed stainless or pre-finished aluminum where marks can’t be buffed out after the fact.
Height loss from repeated regrinding is the quieter failure mode. Every regrind removes material, which shortens the tool and effectively narrows the V-opening you thought you’d set. A die that’s been reground several times can behave like a completely different tool without anyone changing a setting on the machine.
Carbide-tipped tooling and properly hardened 42CrMo or H13 tools built for high-volume runs typically outlast basic tool steel by a wide margin under the same production load. Structured maintenance, cleaning, light lubrication, and controlled storage, is what actually protects that lifespan; skipping it is the single biggest reason tooling wears out faster than its rated service life suggests it should.
How does tooling geometry affect bend quality?
The punch radius and die V-opening you choose don’t just set the angle. They set the whole quality envelope of the bend. A punch radius that’s too small for the material relative to its thickness concentrates stress at the bend line and increases cracking risk, especially on high-strength steel or material bent against the grain.
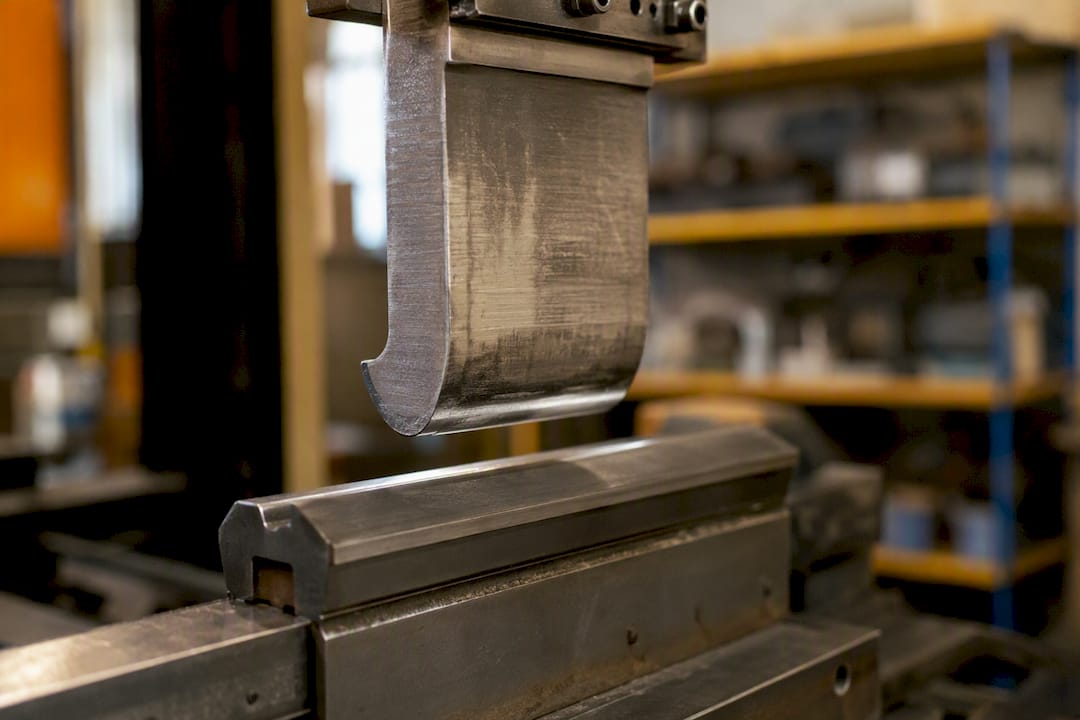
Die opening drives the trade-off between tonnage and precision. A narrow V-opening improves angle control and produces a tighter, more consistent radius, but it demands more tonnage and pushes harder on the material at the point of contact. Widen the opening and tonnage drops, but so does your control over the final angle, and minimum flange length climbs at the same time.
Gooseneck and acute punches introduce their own geometry problems if picked wrong. A gooseneck punch selected for clearance rather than fit can flex slightly under load on longer bends, showing up as a subtle bow along the bend line that’s easy to miss until the part is in assembly. Radius punches matched incorrectly to material thickness produce either excess spring-back or a die mark that shows on the outer surface of the bend.
None of this is guesswork once you’ve measured the part. Match punch radius to material thickness, confirm the die opening against the rule-of-8 with the material’s actual behaviour in mind, and the geometry will do most of the accuracy work before the machine ever cycles.
When do custom or specialty dies make sense?
Standard segmented tooling covers most jobs, but certain parts justify a purpose-built die. Deep box sections, offset bends near a flange edge, or a repeat part running weekly volumes are the classic cases where a custom die earns its cost back through faster cycle time and fewer setup adjustments.
Specialty tooling categories worth knowing:
- Gooseneck dies for reaching into deep, narrow channels standard punches can’t clear
- Offset dies for forming a step or jog in one hit instead of two separate bends
- Radius dies built to an exact inside radius spec, common in architectural and appearance-grade parts
- Hemming and flattening dies for folded edges with no exposed sharp corners, often required for safety or aesthetic reasons on consumer-facing panels
The decision usually comes down to volume and repeatability. A one-off part rarely justifies a custom die; the standard tooling in your rack, even if it takes an extra setup step, gets there for less money. A part that recurs monthly or weekly is a different calculation entirely, since a custom die removes variability from the setup and shortens cycle time every single run.
Shops serving architectural or appearance-grade work lean toward custom radius and non-marking dies more than production shops do, simply because surface finish carries as much weight as the angle itself on a visible railing or panel.
What safety steps matter when changing press brake tooling?
Tooling changes are one of the highest-risk routine tasks on a press brake floor, mostly because they happen often enough that shortcuts creep in. Lockout/tagout before any punch or die swap isn’t optional. A brake that cycles unexpectedly during a tool change causes crush injuries that end careers.
Weight matters more than most operators expect. Larger dies and gooseneck punches carry real mass, and lifting them by hand off a high bed height is a common source of back injury. Use a lifting aid or a second set of hands for anything beyond a light punch, and never let a die rest at an angle where it can tip out of the clamp during installation.
Check clamping torque after every install, not just the first time. A punch or die that seats correctly but isn’t torqued to spec can shift mid-cycle, and a shifted tool under tonnage is both a quality problem and a safety hazard. Confirm the tool is fully seated in the clamp before the first test cycle, and run that first cycle at reduced speed if your machine allows it.
Store spare tooling so edges face away from walkways, and keep a written record of which tools mount where, since a mismatched punch and die pairing under load is a fast way to snap a tool or damage the machine bed. Good documentation prevents the kind of rushed guesswork that leads to incidents.
Is coated or advanced tooling worth it over standard tooling?
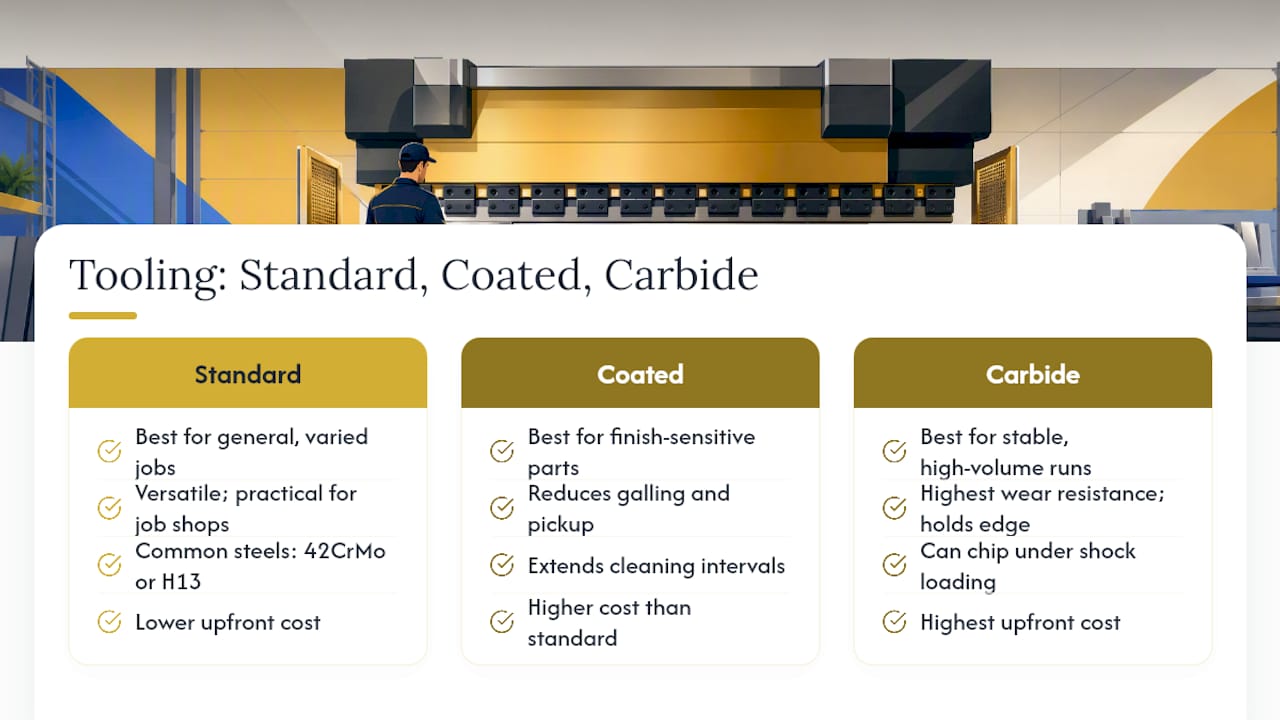
Standard hardened tool steel covers the majority of shop work reliably, but coated and advanced tooling solve specific problems standard tooling can’t. The comparison isn’t about which is universally better. It’s about whether your job mix has the specific pain points advanced tooling addresses.
Surface coatings, often applied to punch noses and die edges on high-wear tooling, reduce galling and material pickup on stainless and aluminum, extending the interval between cleanings and reducing the marking problems that plague uncoated tooling on finished surfaces. Carbide-tipped tooling takes wear resistance further still, holding an edge through production volumes that would round over standard tool steel in a fraction of the time.
The trade-off is upfront cost and, in some cases, brittleness. Carbide tips can chip under shock loading in ways a tougher standard steel won’t, so advanced tooling suits stable, high-volume production more than jobs with frequent material or thickness changes. For a job shop bending a different part every hour, standard segmented tooling in 42CrMo or H13 remains the more practical choice; the versatility matters more than the marginal wear gain.
The honest answer for most shops is a mixed tooling library: standard tooling for general work, with coated or carbide options reserved for the specific high-volume or finish-sensitive jobs that justify the extra cost.
What Manara Corp. looks for when tooling decisions get complicated
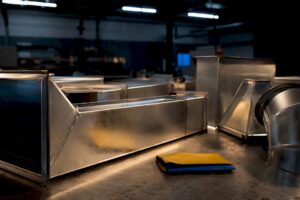
On installation projects, custom dies win when a railing or duct fitting needs a repeatable radius across dozens of identical pieces. Standard segmented tooling wins everywhere else, since job shop work rarely justifies a dedicated die. For architectural clients, surface finish drives the call; for plate work, tonnage and rigidity do.
Get a tooling consultation and trial bends from Manara Corp.
Manara Corp is the local alternative to guessing at tooling specs from a catalogue: bring us your drawing and material spec, and we’ll run a trial bend on our own equipment before you commit to a production quantity.
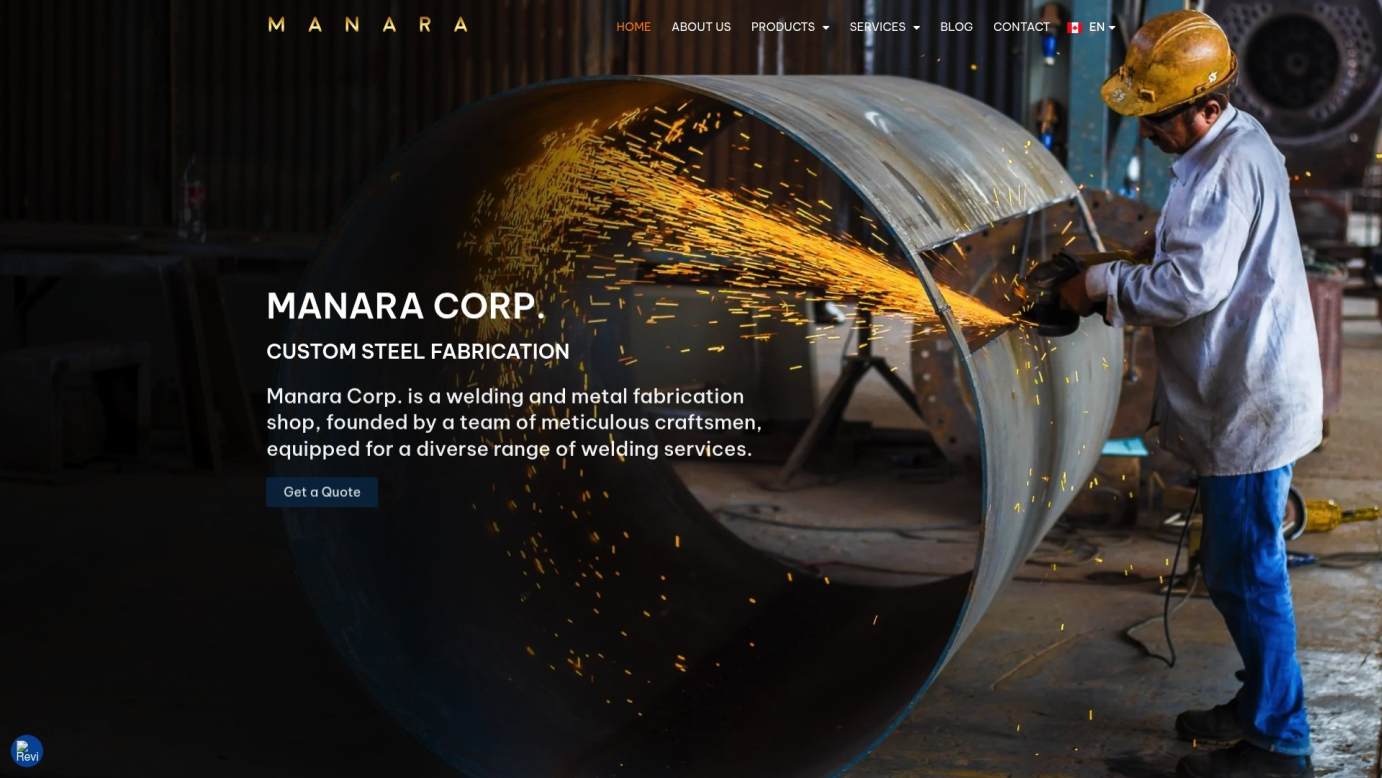
We handle sheet bending and rolling in-house for steel, stainless, aluminum, and copper, which means the tooling questions in this guide (V-opening, tonnage, material hardness) are decisions our shop makes daily on real parts, not theoretical ones. Whether you’re an HVAC contractor needing consistent duct fittings, an architect specifying a railing radius, or a manufacturer with a repeat part that deserves a custom die, we fabricate and install locally across Greater Montreal rather than shipping parts sight-unseen. If your project also needs on-site joining work, our welding services cover steel, stainless, aluminum, and copper from the same shop. Request a tooling consultation or a trial bend quote through our sheet bending and rolling page and we’ll tell you straight whether standard tooling or a custom die is the right call for your part.
Manufacturer pages and technical guides to confirm specs
Verify tang, clamping, and hardness specs directly against supplier datasheets before ordering.
- Press brake tool types and V-die openings
- Press brake tooling guide: materials and maintenance
- Sheet metal fabrication guides and articles
Sources
- The rules of press brake tool selection — The Fabricator
- Gooseneck dies — American Machine Tools
- SigmaBend AP — Sigmanest
- Press brake tooling guide — DurmaPress
FAQ
How much does press brake tooling cost?
Standard punches and dies typically run in the low hundreds of dollars each, while hardened precision or carbide-tipped sets and custom dies commonly cost into the thousands, reflecting the added machining and material.
What is the rule of 8 on a press brake?
The rule of 8 sizes the V-die opening at roughly 8 times the material thickness for air bending, with shops adjusting between 6 and 10 times depending on material and geometry.
What are the different types of press brake tooling?
Press brake tooling splits into punches (standard, gooseneck, acute, radius, hemming) and dies (single-V, multi-V, radius, hemming/flattening), each suited to specific bend geometries and materials.
Is press brake operator a hard job?
It demands real technical skill, since operators must judge material behaviour, tooling fit, and tonnage limits accurately, but structured training and reliable rules like the rule-of-8 make the learning curve manageable for most fabricators.
Should I choose European or American tooling standards?
Choose European or WILA-style tooling for shops running varied, high-mix jobs that benefit from quick-change flexibility, and American-style tooling for heavy plate work where rigidity and long production runs matter more than changeover speed.