TIG (GTAW) is commonly used for thin sheet, tube, and other applications where finish matters, while MIG (GMAW) is preferred for thicker sections and longer runs. For structural connections or anything getting installed permanently, hire a qualified fabricator instead of guessing.
TL;DR:
- Using TIG is recommended for thin, visible aluminum joints, but requires patience and precise control, which makes it slower than MIG for larger sections.
- MIG welding is faster and suited for thicker aluminum parts, but needs specialized equipment like spool guns or push-pull feeders to handle soft wire without kinking.
- Proper preparation, including cleaning with a dedicated stainless brush, degreasing, and correct joint design, is critical to avoid common defects like porosity and lack of fusion.
- Aluminum’s oxide layer and high thermal conductivity demand specific techniques such as removing oxide thoroughly and welding hot and fast to prevent burnout or weak welds.
- For structural, load-bearing, or finish-sensitive aluminum projects, hiring professional shops ensures better quality, consistent results, and proper alloy management.
Table of Contents
- Choosing an aluminum welding method: TIG, MIG, stick or braze?
- Why aluminum welding is harder than welding steel
- Essential equipment and consumables for aluminum welding
- Prepping aluminum for a clean weld: cleaning and fit-up
- TIG welding aluminum step by step
- MIG welding aluminum step by step
- Fixing common aluminum weld defects
- Aluminum welding safety and fume exposure
- How professional shops approach aluminum welding
- Heat treatment and stress relief after welding aluminum
- Inspecting an aluminum weld after the arc goes out
- Aluminum alloys and how weldable they actually are
- What beginners should actually do first
- Get your aluminum welding project done right in Montreal
- Sources
- FAQ
Choosing an aluminum welding method: TIG, MIG, stick or braze?
Two processes cover almost every aluminum job you’ll run into: GTAW, better known as TIG, and GMAW, better known as MIG. Both are the industry’s default choices for aluminum, and picking between them comes down to thickness, appearance, and how much metal you need to lay down in a day.
TIG welding aluminum gives you full control over heat and puddle size. You’re running one hand on the torch and one on the filler rod, watching the puddle the whole time. That control is exactly why TIG dominates on thin sheet (under about 3 mm), visible welds on a bike frame or boat trim, and any repair where a sloppy bead will be seen forever. The tradeoff is speed. TIG is slow, and it takes longer to get good at it than MIG does.
MIG welding aluminum trades some of that control for speed. A wire feeder pushes filler continuously through the gun, so you can lay a consistent bead much faster than TIG, especially on material 3 mm and thicker. Production shops building fence panels, trailer frames or gate sections lean on MIG because the labour hours matter as much as the weld quality.
Stick welding (SMAW) technically has aluminum electrodes, but almost nobody uses it outside of emergency field repairs. The arc is hard to control, the flux leaves a mess to clean, and the results rarely match what TIG or MIG deliver. Treat it as a last resort, not a technique to build skills around.
Brazing isn’t welding in the technical sense. It joins aluminum at a lower temperature using a filler that melts without melting the base metal. It’s useful for thin, delicate assemblies where the heat of a real arc would warp or blow through the part, and for repairs where you don’t have shielding gas on hand.
Here’s how that plays out on real jobs:
- A bicycle frame repair or custom bracket with visible welds: TIG, full stop. The bead quality and heat control you get are worth the extra time.
- A backyard toolbox, trailer rack or fence panel out of 1/8 inch (3.2 mm) or thicker stock: MIG, because you’ll finish in a fraction of the time with acceptable strength.
- A cracked thin sheet panel on a boat or aircraft component: TIG, sometimes with a smaller diameter filler rod to match the thin section.
- A field fix with no gas bottle and a small crack: brazing, understanding it’s a temporary patch, not a structural repair.
If you’re still deciding between the two main processes for your next project, our TIG vs MIG welding breakdown goes deeper into the tradeoffs specific to each metal type.
Why aluminum welding is harder than welding steel
Aluminum fights you in three ways steel never does, and each one has a direct fix once you understand what’s happening underneath the arc.
The first is the oxide layer. The moment aluminum touches air, it forms a thin skin of aluminum oxide, and that skin melts at roughly 2,072°F (1,133°C), compared to around 1,220°F (660°C) for the aluminum underneath it. That’s a massive gap. If you don’t remove that oxide before welding, your arc is trying to fuse a much colder metal through a much hotter shell, and the result is lack of fusion, trapped oxide inclusions, and welds that look fine on the surface but fail under load.
The second is thermal conductivity. Aluminum pulls heat away from your weld puddle roughly four times faster than mild steel does. That heat doesn’t just disappear. It spreads through the whole part, which is why thin aluminum warps, why burn-through happens almost without warning, and why the same amperage that would look sluggish on steel will blow a hole through 1/8 inch aluminum sheet if you linger half a second too long. The practical response is to weld hot and fast rather than slow and cool. Shop experience across the industry backs this up: larger wire diameters and quicker travel speeds tend to produce cleaner, less porous welds than a cautious, low-heat approach.
The third is alloy variability, and this one trips up more beginners than either of the first two. Aluminum isn’t one metal. The 6061 you’re welding might need a different filler alloy than the 5052 sitting next to it on the shelf, and mixing up your choice affects strength, cracking resistance and corrosion behaviour. That variability is also why qualification matters more with aluminum than with mild steel; a filler and technique that works beautifully on one alloy can crack on another.
Put those three factors together and you get aluminum’s signature defects: porosity from trapped gas and oxide, burn-through from heat that built up faster than expected, and lack of fusion from an oxide skin that never actually melted away. None of those are mysterious once you know the mechanism causing them.
Essential equipment and consumables for aluminum welding
You don’t need a fully outfitted production shop to get started, but a handful of specific tools separate a clean weld from a frustrating afternoon.
TIG machines need AC output, not just DC, because the alternating current is what breaks up that oxide layer during the cleaning half of the cycle. Look for a machine with high-frequency start and adjustable AC balance, since balance control lets you dial in more cleaning action on dirty or oxidized material and more penetration on clean stock. Frequency adjustment (typically 60 to 200 Hz on hobbyist machines) tightens or widens the arc cone, which matters more as you move to thinner material.
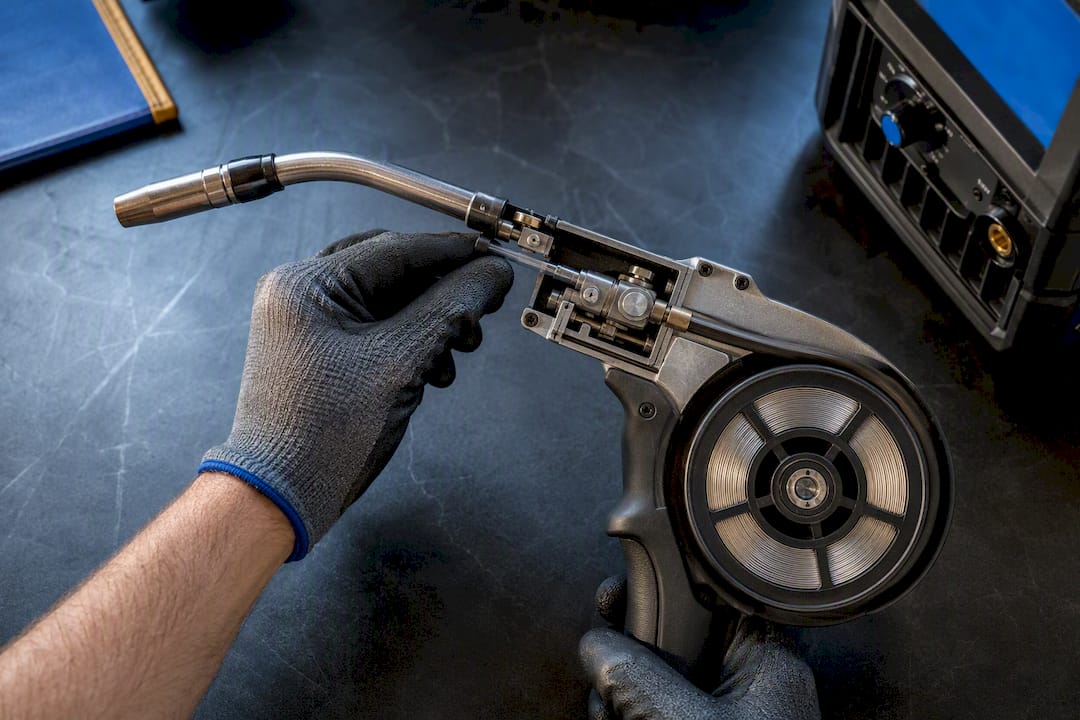
MIG feeding is where aluminum gets awkward, because the wire is soft and kinks easily in a standard feeder built for steel. A spool gun solves this by mounting a small spool of wire right at the gun, cutting the feed distance to inches instead of feet. A push-pull feeder does the same job differently, using a motor at both the machine and the gun to pull wire through smoothly on longer cable runs. Either setup needs a specific aluminum-rated liner and drive rolls; steel drive rolls will shred soft aluminum wire almost immediately.
Shielding gas for aluminum is straight argon, not the argon/CO2 blends common in steel MIG. Flow rate typically runs 15 to 25 CFH depending on gun nozzle size and shop draft; too little and you get porosity, too much and you pull in turbulence that does the same thing.
Filler alloys come down to two choices for most jobs: ER4043, which flows easily and resists cracking on general-purpose welds, and ER5356, which offers better colour match after anodizing and higher strength on 5000-series base metals. Wire diameter scales with thickness: 0.030 inch for thin sheet, stepping up to 0.047 inch or larger on heavier sections.
Round out the setup with:
- A dedicated stainless-steel wire brush, used only on aluminum, never shared with steel or stainless work
- Acetone or a proper aluminum degreaser for the final wipe before welding
- Sturdy clamps rated for the heat, since aluminum’s expansion under heat is aggressive
- Copper or aluminum heat sinks behind thin sections to slow burn-through
Pro Tip: Keep a second wire brush in your kit labelled specifically for aluminum. Cross-contamination from steel particles embedded in a shared brush is a surprisingly common cause of unexplained porosity.
Prepping aluminum for a clean weld: cleaning and fit-up
Most bad aluminum welds trace back to skipped prep, not bad technique. Get this part right and half your defect problems disappear before you strike an arc.
- Brush mechanically, in one direction only. Use your dedicated stainless brush and stroke in a single direction rather than scrubbing back and forth, which just redistributes oxide instead of removing it.
- Degrease immediately after brushing. Wipe the joint area with acetone on a clean rag. Aluminum reoxidizes within hours, so weld the same day you clean, ideally within a couple of hours.
- Tack strategically before running a full bead. Place tacks at both ends of the joint first, then work toward the middle, alternating sides on longer runs to balance the pull as the metal heats.
- Use run-on and run-off tabs on critical joints. Scrap tabs at the start and end of a weld absorb the unstable arc conditions that happen when you strike and finish, keeping those defects off the actual part.
- Clamp for the whole run, not just the tack. Aluminum’s thermal expansion is roughly twice that of steel, so a joint that looks fine tacked can pull noticeably out of alignment mid-weld without solid clamping.
Joint design changes with thickness. On thin sheet under about 3 mm, a butt joint with a slight gap (roughly the thickness of the material) gives the arc somewhere to go without immediately blowing through. On tube, bevel the ends slightly if wall thickness allows, since a square-cut tube joint on thin wall stock leaves almost no room for error on heat input. On thicker sections above 6 mm, a V-groove with a proper root gap lets you get full penetration without needing absurd amperage that would warp the surrounding material.
Before you strike an arc, run through this short checklist:
- Joint surfaces brushed within the last few hours and wiped with acetone
- Correct filler alloy on hand and matched to the base metal
- Clamps and heat sinks positioned, especially on thin sheet
- Gas flow checked and cup or nozzle free of spatter buildup
- Tungsten (for TIG) ground clean with no contamination from a prior steel job
Skipping any one of these is how a Saturday project turns into a weekend spent grinding out welds and starting over.
TIG welding aluminum step by step
Aluminum TIG rewards patience during setup and demands confidence once the arc is lit. Here’s how to run it.
Start with machine settings scaled to thickness. As a rough starting point: 60 to 90 amps for 1/16 inch (1.6 mm) material, 90 to 130 amps for 1/8 inch (3.2 mm), and 130 to 180 amps for 3/16 inch (4.8 mm), adjusting up or down based on joint type and how the puddle responds. Frequency around 120 Hz is a reasonable middle ground for hobbyist-scale work.
Hold the torch at roughly a 15-degree trailing angle, with the tungsten close enough to the puddle that the arc stays tight but not so close you risk dipping and contaminating the tip. Watch the puddle, not the arc itself. Aluminum’s puddle looks noticeably shinier and more fluid than steel’s, and that shine is your best real-time signal of heat input.
The single biggest technique upgrade beginners can make is switching from finger-only filler movement to full-hand puddle control. Sliding your whole hand across a support rather than just flexing your fingers gives you the steady, extended travel needed for long, consistent beads. Finger-only movement runs out of range after an inch or two and forces you to reset, which shows up as stacked dime-shaped ripples instead of one smooth bead.
Feed the filler rod into the leading edge of the puddle, not the back of it, and keep the rod at close to a 90-degree angle relative to the torch. That leading-edge placement keeps filler additions consistent instead of dumping metal unevenly as you go.
Common mistakes to watch for:
- Tungsten contamination: a black, unstable arc almost always means the tungsten tip dipped into the puddle or filler rod. Grind it clean and restart.
- Unstable or wandering arc: often a sign of AC balance set too far toward penetration, leaving too much oxide unremoved. Shift balance toward cleaning and retest on scrap.
- Puddle collapsing suddenly (burn-through): usually too much heat for the thickness. Drop amperage or pick up travel speed rather than dragging the arc.
- Dull, grey welds instead of shiny: almost always contaminated shielding gas coverage, either from wind, low flow, or a damaged cup.
Pro Tip: Practice full-hand puddle control on scrap before you ever touch a real part. It feels awkward for the first few passes, but it’s the difference between welds that look assembled and welds that look welded.
MIG welding aluminum step by step
MIG aluminum lives or dies on feed setup. Get the wire path right and the rest is mostly travel speed and patience.
A spool gun or push-pull feeder is not optional for aluminum MIG past a hobbyist trial run. Standard steel feed setups push soft aluminum wire through several feet of liner, and it kinks, birdnests, or stops feeding entirely under that resistance. A spool gun mig welding aluminum setup mounts the spool at the gun itself, which is the simplest fix for garage-scale work. Push-pull systems suit longer cable runs common in production settings, using a synchronized pull motor at the gun end to match the push motor at the feeder.
Whichever feeder you run, swap in an aluminum-specific liner (usually a nylon or Teflon-lined type instead of steel coil) and matching drive rolls sized to your wire diameter. Tension on the drive rolls should be just enough to feed smoothly. Aluminum wire deforms under the same tension that steel wire tolerates easily, and an oval, flattened wire feeds erratically.
Use a push technique, gun leading away from the puddle rather than dragging behind it, at roughly a 10 to 15 degree push angle. Travel speed for aluminum MIG typically runs faster than the equivalent steel job, often in the range of 15 to 25 inches per minute depending on thickness and amperage, matching that “hot and fast” principle that keeps heat from pooling and warping the part.
Pulse MIG helps considerably on thinner material and out-of-position welding, since the pulsing action delivers controlled bursts of heat rather than a continuous arc, reducing the risk of burn-through while still keeping decent travel speed. If your machine offers a pulse aluminum program, start there rather than dialing in standard MIG parameters from scratch.
Feed problems show up in predictable ways:
- Popping or sputtering arc: usually feed speed too fast for the amperage, or a partially clogged contact tip from aluminum residue
- Wire feeding in fits and starts: check drive roll tension first, then inspect the liner for kinks
- Excessive spatter: often voltage set too high relative to wire speed
- Weak, undersized bead: travel speed too fast for the amperage, or wire speed too slow
Fixing common aluminum weld defects
Most defects trace back to one of four root causes, and each has a specific, repeatable fix rather than a vague “try again.”
Porosity shows up as small pinholes scattered through the bead, usually from moisture or contamination getting trapped in the puddle as it solidifies. Aluminum is notorious for pulling moisture out of the air, so store filler wire and rod in a sealed container, not an open bin on a damp shop floor. Combine dry storage with thorough brushing right before welding and correct gas flow (15 to 25 CFH, no drafts), and porosity drops dramatically.
Burn-through happens when heat outpaces the part’s ability to dissipate it, typically on thin sheet or near existing tacks where heat has already built up. The fix is almost always travel speed first, amperage second: pick up your pace before you drop your amps. A copper backing bar behind a thin joint also gives the heat somewhere to go besides straight through the part.
Lack of fusion looks deceptively clean on the surface but leaves a weak, unbonded seam underneath. It’s the direct result of oxide that never fully cleared, insufficient penetration from too little heat, or travel speed too fast for the joint to actually melt together. If you suspect it on a critical part, grinding out and rewelding is faster and safer than hoping it holds.
Smut, or the dark grey to black residue you sometimes see near a finished weld, is oxide byproduct from aluminum and magnesium reacting during welding, not soot from burning contamination. It signals inadequate shielding coverage or leftover surface contamination rather than a cosmetic issue you can ignore. A stainless brush removes light smut, while electrochemical cleaning systems handle heavier heat tint on finish-critical parts without the aggressive chemicals older methods relied on.
Aluminum welding safety and fume exposure
Aluminum fumes carry real risk, and the byproducts differ from what you’d breathe welding mild steel. AC TIG in particular generates ozone from the UV output of the arc, and both TIG and MIG produce nitrogen oxides alongside fine aluminum oxide particulate. None of that is something to shrug off in a closed garage.
For home and small-shop setups, a portable fume extractor positioned close to the arc captures far more contaminant than general room ventilation alone; good commercial kitchen ventilation in Alberta design principles can also inform effective fabricator shop ventilation. Local capture at the source beats trying to clear a whole room after the fact.
Quebec’s occupational exposure limits (PEVs) set specific thresholds for welding fume components, and workplaces fall under CNESST oversight for compliance and monitoring. Hobbyists aren’t bound by workplace regulation, but the same exposure limits are a reasonable benchmark for how seriously to take ventilation at home.
PPE for aluminum welding needs a few specifics beyond a standard steel setup: a respirator rated for welding fume when working in an enclosed space, a properly shaded auto-darkening helmet (AC TIG’s arc is notably bright), and gloves plus long sleeves to guard against UV exposure, since aluminum’s arc throws more ultraviolet than a comparable steel weld.
How professional shops approach aluminum welding
A shop that welds aluminum daily treats every step differently than a one-off hobby project does. Alloy selection happens before the quote is even finalized, matched against the part’s load, finish requirements and whatever it’s getting joined to. Trial welds on offcuts confirm parameters before the torch ever touches the actual part, and in-house fixtures hold heat sinks and clamps in exactly the right spot to control distortion on longer runs.
That in-shop control is what separates a fabricated rail post that fits perfectly on install day from one that needs on-site persuasion with a mallet. It’s also why structural connections, tight-tolerance assemblies, and anything with a finish that has to look flawless are worth handing to a professional rather than attempting on a first try. DIY aluminum welding is a genuinely satisfying skill to build on scrap and small projects; it’s a different proposition on a load-bearing railing or a staircase stringer.
Heat treatment and stress relief after welding aluminum
Welding changes aluminum’s properties in the heat-affected zone, and for heat-treatable alloys like the 6000 series, that change can mean a real drop in strength right around the weld. The heat from welding partially reverses the artificial aging that gave the alloy its strength in the first place.
Post-weld heat treatment can recover some of that lost strength, typically through a solution treatment followed by aging, but it requires controlled furnace temperatures and timing specific to the alloy, which is well beyond what a home shop setup can reliably deliver. For non-heat-treatable alloys like the 5000 series, the concern shifts from strength recovery to residual stress, the internal tension left behind as the weld cools unevenly.
Stress relief for those alloys usually means either a controlled low-temperature bake or, more commonly on hobbyist and small-shop work, simply allowing the part to cool slowly and evenly rather than quenching it or exposing it to drafts right after welding. Uneven cooling is what drives warping on thin panels, so clamping a part flat while it cools is a practical substitute for formal stress relief on most non-critical projects.
For anything genuinely structural, where the post-weld strength has to be verified rather than assumed, that’s a case for procedure qualification and, often, professional heat treatment rather than a shop-floor guess.
Inspecting an aluminum weld after the arc goes out
Visual inspection catches most problems before you need anything more sophisticated. Look for consistent bead width, even ripple pattern, and no visible porosity or undercut along the toe of the weld. A weld that looks rough on the surface is almost never sound underneath either.
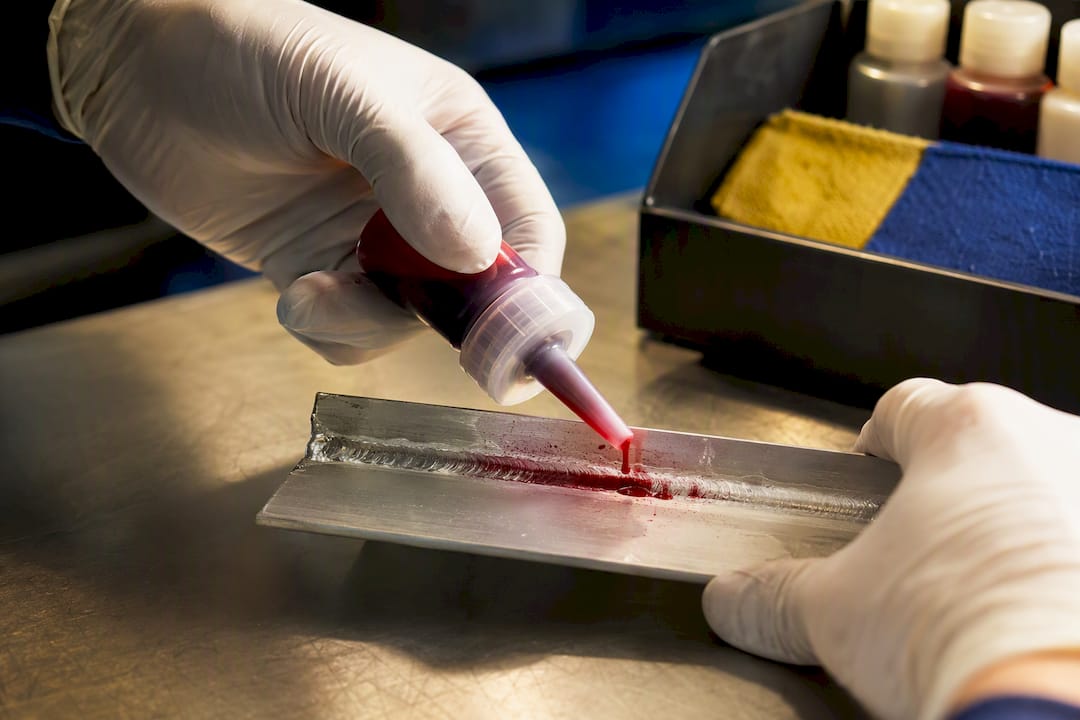
Dye penetrant testing goes a step further for surface-breaking defects that visual inspection might miss, particularly fine cracking. A liquid dye is applied, wiped off the surface, then drawn back out of any crack by a developer, making hairline defects visible that the naked eye would walk right past. It’s inexpensive and doesn’t require special equipment beyond the dye kit itself, which makes it accessible for a small shop or serious hobbyist checking critical joints.
Ultrasonic testing is the method that finds what’s happening inside the weld, not just on the surface, using sound waves to detect internal porosity, lack of fusion, or inclusions that would otherwise stay hidden until the part failed under load. It requires trained interpretation and dedicated equipment, so it’s realistically the domain of professional fabrication rather than a home shop tool.
For a hobby project, thorough visual inspection plus the occasional dye penetrant check on anything load-bearing covers most needs. For structural or code-governed work, AWS D1.2’s qualification requirements call for a documented inspection process matched to the application, which is one more reason structural aluminum belongs with a qualified fabricator rather than a first attempt at home.
Aluminum alloys and how weldable they actually are
Not every aluminum alloy welds the same way, and knowing which family you’re working with changes both filler choice and how forgiving the process will be.
The 6000 series (6061 being the most common) welds reasonably well but is heat-treatable, meaning the weld zone loses some strength as the heat undoes prior aging. ER4043 filler is the standard choice here, offering good crack resistance and easy flow.
The 5000 series (5052 and 5083 among the common grades) is not heat-treatable and generally welds more forgivingly, with less sensitivity to cracking. ER5356 filler is the usual match, particularly when the finished part will be anodized, since 5356 gives a closer colour match than 4043 after anodizing.
The 2000 and 7000 series, common in aerospace applications, are considerably harder to weld and prone to cracking. These generally fall outside hobbyist scope and call for procedure qualification and specialized technique.
If you’re unsure which alloy you’re holding, our comparison of 6061 versus 5052 aluminum breaks down the practical differences that matter for welding and finishing decisions.
What beginners should actually do first
Skip the temptation to start with TIG on thin, visible material just because it looks impressive online. Start with MIG on thicker scrap, where mistakes are more forgiving and you’ll build feel for how aluminum’s heat behaves before you’re fighting a finicky arc and a filler rod at the same time. Move to TIG once you’re comfortable, and save it for the jobs where appearance actually matters.
Prioritize cleaning, clamping and short, repeatable beads over trying to run one long, impressive-looking pass. A row of consistent two-inch beads teaches you more than one wandering twelve-inch attempt. And when a job crosses into structural territory, a railing, a stair stringer, anything bearing real load, hand it to a professional shop rather than treating it as the project you learn on.
— Ash
Get your aluminum welding project done right in Montreal
Reliable shops exist to handle aluminum work that needs to hold up: railings, stair components, custom brackets and structural assemblies fabricated in-shop and installed on-site locally.

We handle alloy selection, run trial welds before committing to the final piece, and use in-house fixtures to control heat input on longer runs, the same fit and finish control a hobby setup in a garage can’t easily replicate. That matters most on anything structural, anything with a tight tolerance, or anything where the weld has to look as good as it holds. Our aluminum and general welding services cover everything from a single custom bracket to full staircase and railing installations for homeowners, contractors and designers across the island, Laval, the South Shore and the West Island.
If your project involves aluminum that needs to be structurally sound, finish-critical, or installed on-site rather than shipped, get in touch for an estimate and we’ll walk through what the job actually needs before any metal gets cut.
Sources
- How to Weld Aluminum: Techniques, Tools, and Safety Tips (Welding Digest, AWS)
- TIG welding aluminium for beginners (Miller Knowledge Hub)
- A guide to aluminum welding (Lincoln Electric)
- Structural Welding Code—Aluminum (AWS D1.2:2026)
FAQ
What type of welding is used for aluminum?
TIG (GTAW) and MIG (GMAW) are the two standard methods. TIG suits thin sheet and appearance-critical joints, while MIG suits thicker material and faster production runs.
Can I weld aluminum at home?
Yes, with an AC-capable TIG machine or a MIG setup fitted with a spool gun or push-pull feeder, plus proper argon shielding and ventilation. Structural or load-bearing work is better left to a qualified fabricator like Manara Corp.
Why is it difficult to weld aluminum?
Aluminum’s oxide layer melts hundreds of degrees hotter than the base metal beneath it, and the metal conducts heat away roughly four times faster than steel, which together make oxide removal and heat control far more demanding than welding mild steel.