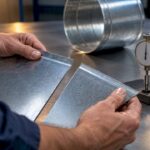
Yes, stainless steel can be welded, and most fabricators would say it welds more predictably than people expect once you respect three variables: chemistry, heat, and atmosphere. Match your filler to the base metal, control heat input and interpass temperature, and shield the weld pool properly, and you’ll get a sound joint. Skip any one of those and you’ll fight porosity, cracking, or a weld that rusts within a year.
- Chemistry: match filler metal to base grade (ER308L for 304, ER316L for 316L)
- Heat: control input and interpass temperature to avoid distortion and sensitization
- Atmosphere: shield the weld pool and back-purge where corrosion resistance matters
If you’re practising thin 304 or 316 sheet with a TIG torch in your garage, go for it. If the job is duplex or super duplex pipe headed for pressure service, that’s a call for an experienced shop.
Key Takeaways
Stainless steel welding succeeds when filler chemistry matches the base grade, heat input stays within the grade’s tolerance, and post-weld passivation restores the chromium oxide layer that heat damaged.
| Point | Details |
|---|---|
| Match filler to grade | Use ER308L for 304, ER316L for 316L, and ER2209 or ER2594 for duplex and super duplex grades. |
| Control interpass temperature | Keep many austenitic jobs under roughly 175°C between passes; duplex grades need tighter limits still. |
| Never skip passivation | Heat tint signals chromium depletion; mechanical cleaning plus acid passivation or electropolishing restores it. |
| Protect against fumes | Use local exhaust ventilation and a rated respirator to manage hexavalent chromium exposure. |
| Know your limits | DIY suits thin 304/316 practice work; hire Manaracorp for duplex, pressure piping, or finish-critical jobs. |
Table of Contents
- Stainless steel welding techniques vary by grade, not just process
- Choosing between TIG, MIG, and stick for stainless steel welding
- What equipment and consumables does stainless steel welding require?
- Preparing stainless steel for welding: cleanliness and fit-up
- Heat control and distortion in stainless steel welding
- Torch angle, travel speed, and puddle control
- Post-weld cleaning and passivation restore corrosion resistance
- Fixing the most common stainless steel welding mistakes
- Stainless steel welding safety: fumes, PPE, and chemical handling
- Sources
- FAQ
Stainless steel welding techniques vary by grade, not just process
Weldability isn’t one-size-fits-all across the stainless family. Austenitic grades like 304 and 316 are the easiest starting point: they’re non-hardenable on cooling, so most jobs skip pre and post-weld heat treatment entirely. The catch shows up in thick sections, where the heat-affected zone can suffer grain coarsening that quietly saps toughness, according to TWI’s technical guidance on austenitic stainless welding.
- Austenitic (304/316): forgiving, weldable with most processes, watch thick-section HAZ toughness
- Ferritic/martensitic: hydrogen cracking risk, preheat and interpass rules differ from austenitic practice
- Duplex/super duplex: narrow heat-input window, careful filler choice needed to preserve the ferrite/austenite phase balance
Pro Tip: If you’re not sure what grade you’re holding, don’t guess. A quick spark test or magnet check (austenitic is non-magnetic, ferritic and martensitic are magnetic) can save you from a mismatched filler and a cracked weld.
Choosing between TIG, MIG, and stick for stainless steel welding
Process choice comes down to thickness, joint access, and how the finished weld needs to look. Stainless steel TIG welding gives you the tightest control and the cleanest bead, which is why it dominates pipe root passes and any visible, cosmetic joint. It’s slower, though, and demands more operator skill to keep the arc length and filler feed consistent.
Stainless steel MIG welding earns its keep on thicker plate and production runs where speed matters more than a mirror finish. Get the shielding gas mix and transfer mode wrong, though, and you’ll see spatter and inconsistent penetration fast.
- TIG (GTAW): best for thin sheet, pipe roots, and cosmetic welds; highest skill ceiling
- MIG (GMAW): faster on thicker material; needs correct shielding mix and transfer mode dialed in
- Stick (SMAW) and flux-cored (FCAW): practical for field repairs and windy job sites, but expect more slag and post-weld cleanup
The AWS D10.4 guide for welding austenitic stainless piping and tubing_PV.pdf) lays out process-specific parameters for all four methods, plus filler selection tables that account for ferrite control to prevent solidification cracking in fully austenitic welds. That’s a detail hobbyist guides often skip, and it’s part of why professional fabrication shops lean on documented procedures rather than trial and error.
What equipment and consumables does stainless steel welding require?
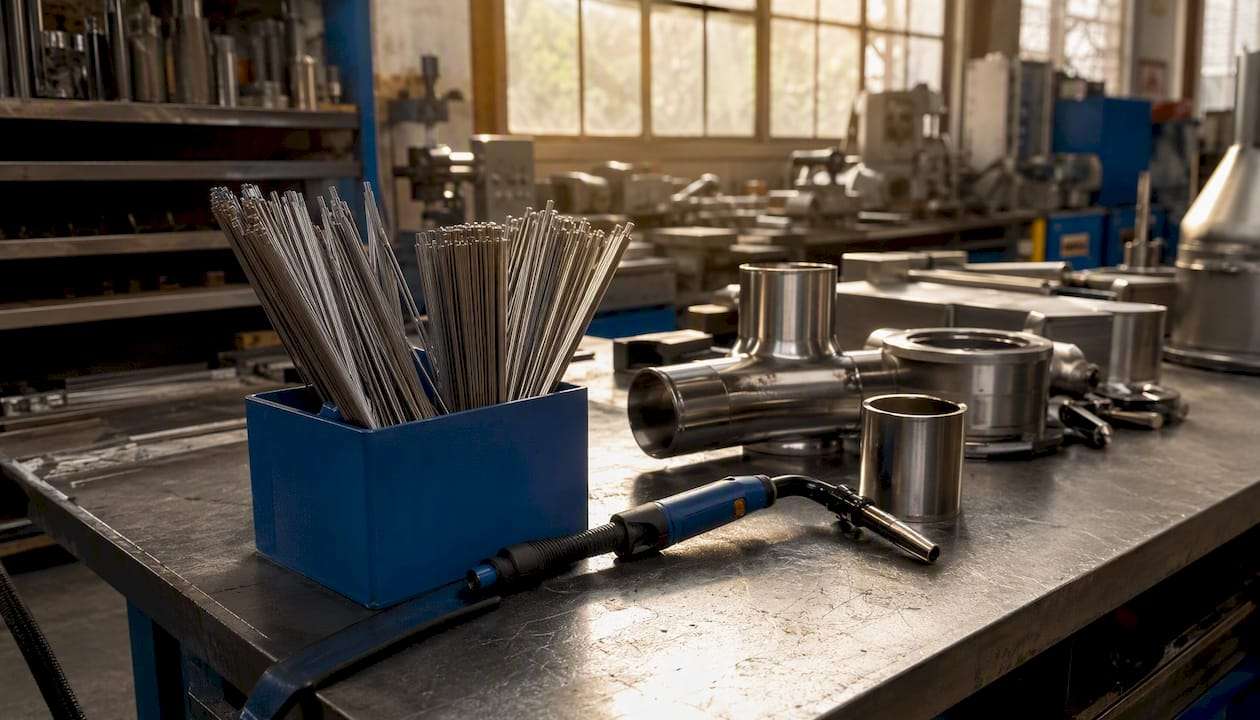
Getting the filler wrong is one of the most common and most avoidable mistakes in stainless steel welding equipment selection. Match the filler to the base metal, not just the process: ER308L pairs with 304, ER316L with 316L, and duplex 2205 calls for ER2209 (with ER2594 for super duplex 2507). Low-carbon “L” grade fillers reduce the risk of carbide precipitation at the grain boundaries during cooling.
Shielding gas matters just as much as filler choice. TIG work generally runs on 100% argon, while MIG benefits from an argon-based tri-mix or a small helium/CO2 addition depending on transfer mode. For duplex TIG root passes, adding 1 to 2% nitrogen to the argon shield helps preserve phase balance. On 316L specifically, the molybdenum in the weld metal that gives it pitting resistance oxidizes easily, so high-purity argon shielding on root passes is worth the extra cost, per TWI’s follow-up guidance on austenitic welding.
- Tungsten: 2% thoriated or ceriated, sized to amperage and joint access
- Wire feed: spray transfer for thicker plate, pulsed for thin sheet and out-of-position work
- Stick electrodes: match E308L-16 or E316L-16 to base metal chemistry
Pro Tip: Buy fresh shielding gas and check your regulator before a critical job. Old or contaminated argon is a sneaky source of porosity that gets blamed on technique instead.
Preparing stainless steel for welding: cleanliness and fit-up
Contamination causes more welding stainless steel headaches than any other single factor. Oils, mill scale, and even fingerprints introduce carbon and hydrocarbons into the weld pool, and that’s where porosity and cracking start.
- Degrease the joint area with a solvent cleaner before any mechanical work
- Brush with a dedicated stainless steel wire brush, never one that’s touched carbon steel
- Check fit-up and gap consistency along the full joint length
- Grind or file to remove mill scale right at the fusion line
- Never use carbon steel brushes, grinding discs, or clamps on stainless. Embedded iron particles cause surface rust that looks like the base metal is failing
- Tight, consistent gaps prevent burn-through on TIG and poor penetration on MIG
Heat control and distortion in stainless steel welding
Heat input is the total energy delivered to the joint, and austenitic and duplex grades tolerate very different windows of it. Push too much heat into an austenitic weld and you risk sensitization, where chromium carbides precipitate at grain boundaries and rob the material of corrosion resistance right where you need it most.
Interpass temperature, the temperature the joint cools to between passes, needs a ceiling. Many austenitic jobs stay under roughly 175°C between passes; duplex and super duplex need to run cooler still, since the AWS guide notes duplex heat input windows typically fall between 0.5 and 1.5 kJ/mm to protect the ferrite/austenite balance.
- Sequence welds to spread heat rather than concentrate it in one area
- Use short weld runs and a planned tack pattern instead of one continuous pass
- Backing bars and fixtures hold parts flat while the joint cools
Pro Tip: A cheap infrared thermometer pointed at the joint between passes is one of the best five-dollar upgrades you can make to your stainless steel welding equipment.
Torch angle, travel speed, and puddle control
Bead quality comes down to a handful of habits you can actually practise. Keep TIG arc length short and consistent, angle the torch around 10 to 15 degrees from vertical, and let travel speed track the puddle rather than racing ahead of it.
Stringer beads generally beat a heavy weave on stainless, since less weave means less heat spread into the surrounding metal. Save weaving for wider gaps or out-of-position work, and reach for pulse settings when you need to manage heat on thin sheet without sacrificing penetration.
- Add filler at the leading edge of the puddle, not by dabbing into the arc itself
- Clean between passes on multi-pass joints. Trapped oxide becomes an inclusion
- Sequence passes to balance dilution and keep filler chemistry dominant in the finished weld
Pro Tip: If your bead looks frosty white with a tight, shiny ripple, your gas coverage and heat are dialed in. A dark, sooty bead means your shielding gas flow or purge needs attention before you go further.
Post-weld cleaning and passivation restore corrosion resistance
That rainbow heat tint around a fresh stainless weld isn’t cosmetic. It’s visible proof that the near-surface chromium oxide layer has been depleted by heat, and that depletion is exactly what makes stainless resist corrosion in the first place.
Post-weld cleaning is not optional for corrosion-critical work. The British Stainless Steel Association notes that heat tint deeper than a pale straw colour should be mechanically removed and chemically passivated, particularly for applications like drinking water systems where the surface finish directly affects service life.
Mechanical dressing (grinding or brushing with stainless-only tools) removes the visible tint but doesn’t fully restore the chromium-rich surface layer on its own. Acidic pickling strips the tint more aggressively, while nitric or citric acid passivation rebuilds the passive oxide film. Electropolishing goes further still, smoothing the surface at a microscopic level, which is why it’s often specified for pharmaceutical and food-grade equipment. Electrolytic weld cleaning is a faster, less harsh middle ground worth considering for routine shop cleanup.
Pro Tip: Citric acid passivation is gentler on operators and the environment than nitric acid, and it performs comparably for most general fabrication work. Save nitric for jobs with tight specification requirements.
Fixing the most common stainless steel welding mistakes
Most defects trace back to one of three causes: contamination, wrong heat, or wrong filler. Porosity usually means trapped gas from a dirty joint or inadequate shielding. Hot cracking shows up in fully austenitic welds with poor ferrite content, often from the wrong filler choice or too much dilution from the base metal. Lack of fusion points to travel speed that outran the puddle or amperage that was too low for the joint.
| Defect | Likely Cause | Fix |
|---|---|---|
| Porosity | Contaminated shielding gas or dirty joint | Re-clean surfaces, check gas purity and flow rate |
| Hot cracking | Low ferrite filler or excessive dilution | Switch filler, reduce heat input, slow travel |
| Lack of fusion | Travel speed too fast, amperage too low | Slow down, increase amperage, adjust angle |
| Heat tint corrosion | Skipped post-weld passivation | Mechanically clean, then passivate or electropolish |
- Work through a checklist in order: base metal and filler match, shielding integrity, machine settings, then technique
- Visible defects call for grinding and re-welding; suspect subsurface issues on critical joints justify dye penetrant testing or radiography before the part goes into service
Stainless steel welding safety: fumes, PPE, and chemical handling
Welding stainless produces hexavalent chromium in the fume, a recognized respiratory hazard that demands real ventilation, not just a fan pointed in the general direction of the smoke.
Local exhaust ventilation and appropriate respiratory protection are standard recommendations for controlling hexavalent chromium exposure during stainless welding, according to guidance from the National Institute of Environmental Health Sciences and exposure control standards published by OSHA.
- Respirator rated for welding fume, not just a dust mask
- Auto-darkening helmet, flame-resistant clothing, and welding gloves suited to your process
- Pickling and passivation acids need proper ventilation, neutralization, and disposal. If your shop doesn’t handle acid waste regularly, outsourcing that step to a specialist is often the safer call
A shop’s take on when to DIY and when to call in help
Small cosmetic or hobby work on 304 or 316, done with a TIG setup and some patience, is a great way to learn. Duplex, super duplex, pressure piping, and anything with tight tolerances or a finish spec belongs with an experienced crew who can document the procedure and back it with real quality assurance.
Why hire a professional welding shop for stainless steel work
Some jobs are worth doing yourself. Others, like duplex piping, pressure-rated welds, or anything with a corrosion-resistance spec attached, carry real consequences if the joint fails. That’s where a shop with certified procedures, the right consumables on hand, and documented inspection earns its cost.
Manaracorp fabricates and welds steel, stainless steel, aluminum, and copper in-shop, with the equipment and experience to handle everything from a single custom railing to full HVAC ductwork runs. Every stainless job gets proper post-weld cleaning and passivation as part of the process, not an afterthought tacked on at the end. If your project needs a fabricator who treats corrosion resistance as a deliverable rather than an option, get in touch through Manaracorp’s welding services page for a quote, or browse the full range of welding capabilities to see what fits your project across Greater Montreal.
Sources
- Welding of austenitic stainless steel – TWI
- Post weld cleaning and finishing of stainless steels – British Stainless Steel Association
- Hexavalent chromium – NIEHS
- Hexavalent chromium – OSHA
FAQ
Can stainless steel be welded easily?
Yes, particularly austenitic grades like 304 and 316, which are non-hardenable and generally don’t need pre or post-weld heat treatment. Success depends on matching filler chemistry, controlling heat input, and cleaning the joint thoroughly beforehand.
How do you join two pieces of stainless steel together?
TIG, MIG, and stick welding all join stainless steel effectively, with process choice depending on material thickness, joint access, and required finish. Proper filler match, shielding gas, and post-weld passivation complete the job.
Is MIG or TIG better for stainless steel?
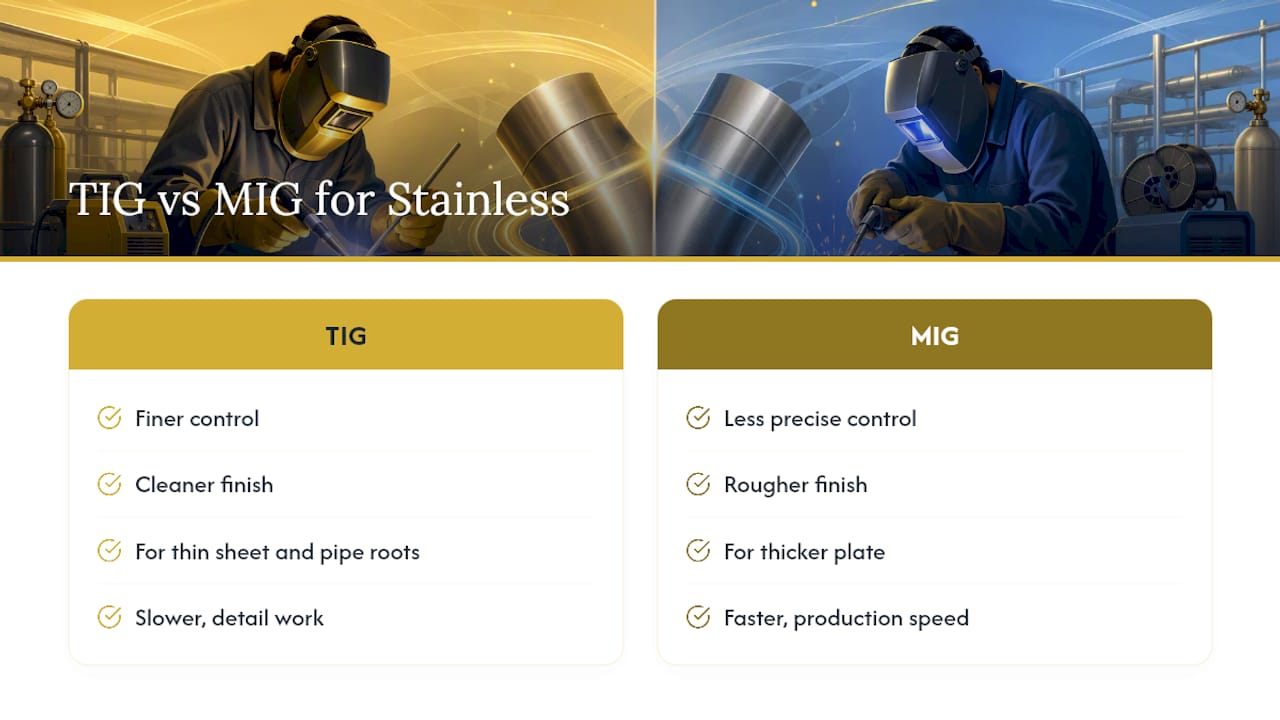
TIG gives finer control and a cleaner finish, making it the standard choice for thin sheet, pipe roots, and visible welds. MIG works better for thicker plate and production speed, provided the shielding gas mix is correct.
What type of welder is best for welding stainless steel?
A TIG (GTAW) machine with pulse capability offers the most control for stainless, especially on thin material and cosmetic joints. For thicker plate or production work, a MIG machine with proper gas mixing capability handles the job faster.