For most beginners and general fabrication work, MIG welding is the right starting point. It’s faster, easier to learn, and handles the widest range of common projects. TIG welding earns its place when the weld needs to look perfect, when the metal is thin, or when you’re working with aluminium, stainless, or exotic alloys.
Quick-verdict rules:
- Choose MIG for thicker steel starting around a few millimeters thickness, structural work, and any job where speed matters more than finish.
- Choose TIG for thin aluminium, stainless steel, and any seam that will be visible in the finished piece, without specifying exact thickness.
- Choose MIG if you’re a beginner. Most instructors recommend starting with MIG before attempting TIG.
- Hire a professional for structural welds, code-sensitive work, or any aluminium joint where appearance and integrity both matter.
The industry terms are GMAW (Gas Metal Arc Welding) for MIG and GTAW (Gas Tungsten Arc Welding) for TIG. Both are standard processes across Canadian fabrication shops. Manaracorp, based in Lachine and serving Greater Montreal, uses both daily depending on the project.
Key takeaways
MIG welding is the right starting point for most beginners and production work, while TIG welding is the standard for thin metals, visible seams, and precision applications.
| Point | Details |
|---|---|
| MIG for speed and structure | MIG (GMAW) is faster, easier to learn, and best for steel at 3 mm and above. |
| TIG for finish and thin metal | TIG (GTAW) produces cleaner welds with minimal spatter; essential for aluminium under 2 mm and visible seams. |
| Equipment cost difference | Entry-level MIG setups run CAD —; TIG setups start around CAD —. |
| Beginners should start with MIG | Most instructors recommend MIG first; TIG requires coordinated two-hand and foot-pedal technique. |
| Manaracorp for professional work | Manaracorp provides MIG and TIG welding across Greater Montreal for railings, stairs, ductwork, and custom fabrication. |
Table of Contents
- How do TIG and MIG welding compare side by side?
- How does each welding process actually work?
- What are the real advantages and disadvantages of each process?
- Which metals and thicknesses suit MIG or TIG?
- What are your shielding gas options, and can you weld outdoors?
- How do speed, equipment, and costs compare in real numbers?
- How long does it take to learn each process, and what does it pay?
- Which process should you use for common projects?
- How does a Greater Montreal shop choose between TIG and MIG?
- When should you hire Manaracorp for welding work in Greater Montreal?
- Useful sources
- FAQ
How do TIG and MIG welding compare side by side?
| Dimension | MIG (GMAW) | TIG (GTAW) |
|---|---|---|
| Ease / skill level | Beginner-friendly; one-handed operation | Demanding; requires two hands and a foot pedal |
| Weld speed / productivity | Fast; high deposition rate | Slow; deliberate, controlled passes |
| Weld appearance / finish | Functional; more spatter and cleanup needed | Clean, precise, minimal spatter |
| Suitable materials & thickness | Mild steel, stainless, aluminium (with spool gun); best at 3 mm+ | All metals including exotic alloys; excels at thin sections under 3 mm |
| Equipment & consumable cost | Entry-level setup: CAD range | Entry-level setup: CAD range |
| Shielding gas / outdoor suitability | Argon/CO₂ mix; flux-core option works outdoors | Pure argon or argon/helium; no gasless option; poor outdoors |
| Typical applications / best-for | Structural steel, auto frames, fencing, HVAC ductwork | Architectural railings, thin aluminium, food equipment, visible seams |
Reading the table: when a cell says “excels,” that process is the clear choice. When both processes could work, the deciding factor is usually finish quality versus time budget. There are no vendor names here because the process choice matters far more than the brand of machine at the entry level.
How does each welding process actually work?
MIG and TIG welding share the same basic principle: an electric arc melts metal to form a weld pool. What separates them is how that arc is created and how filler metal is added.
MIG: continuous wire, one hand on the gun
MIG feeds a spool of consumable wire through the welding gun at a set speed. The wire itself becomes the electrode and the filler metal simultaneously. You pull the trigger, the wire feeds, the arc strikes, and the weld pool forms. The machine handles most of the variables: wire speed, voltage, and gas flow are dialled in before you start. Your job is to hold the gun at the right angle, maintain a consistent travel speed, and keep the tip-to-work distance steady.
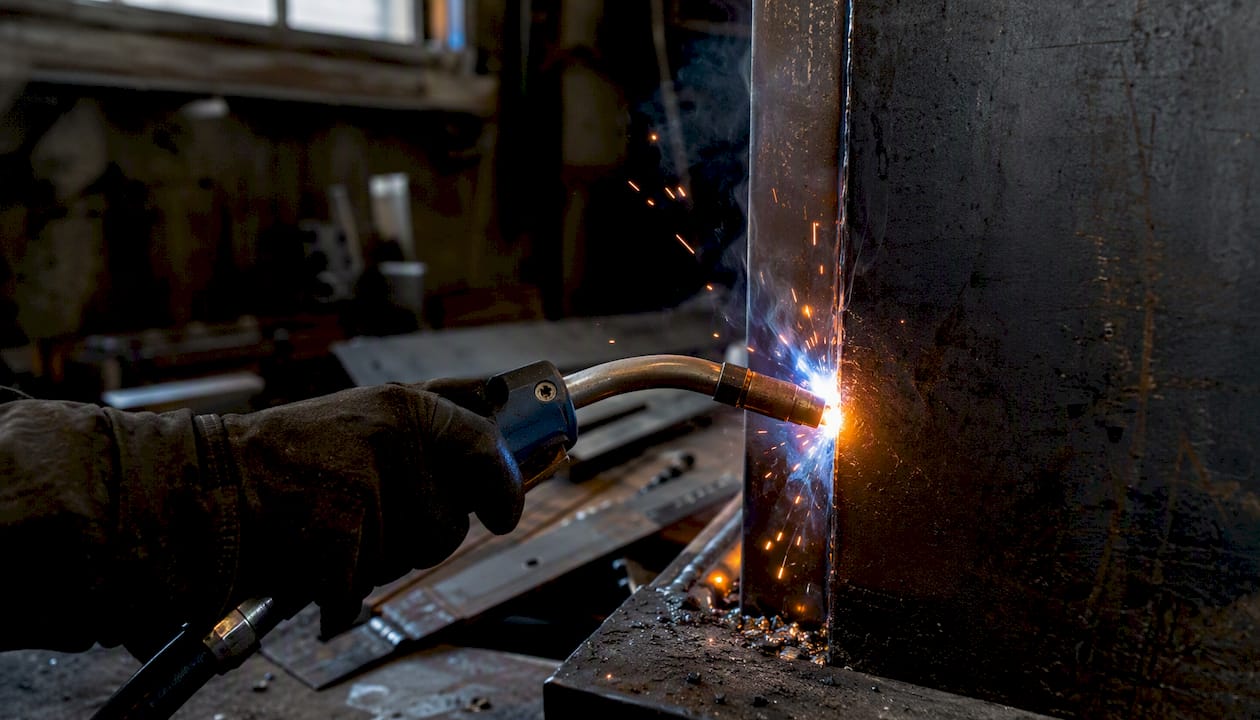
The physical motion is a bit like caulking a bathtub. One hand holds the gun; the other is free to brace yourself or hold the workpiece. The arc is relatively forgiving, and the weld pool fills quickly.
Essential MIG equipment:
- MIG welder with wire spool and drive rolls
- Welding gun and ground clamp
- Shielding gas cylinder and regulator (or flux-core wire for gasless work)
- Welding helmet, gloves, and fire-resistant jacket
- Wire brush and angle grinder for cleanup
TIG: tungsten electrode, two hands, and a foot
TIG uses a non-consumable tungsten electrode to create the arc. The electrode does not melt into the weld. Instead, you feed a separate filler rod into the weld pool with your free hand, dipping it in and pulling it back in a rhythmic motion. Your foot controls amperage through a pedal, letting you increase heat to penetrate thicker sections and back off to avoid burning through thin metal.
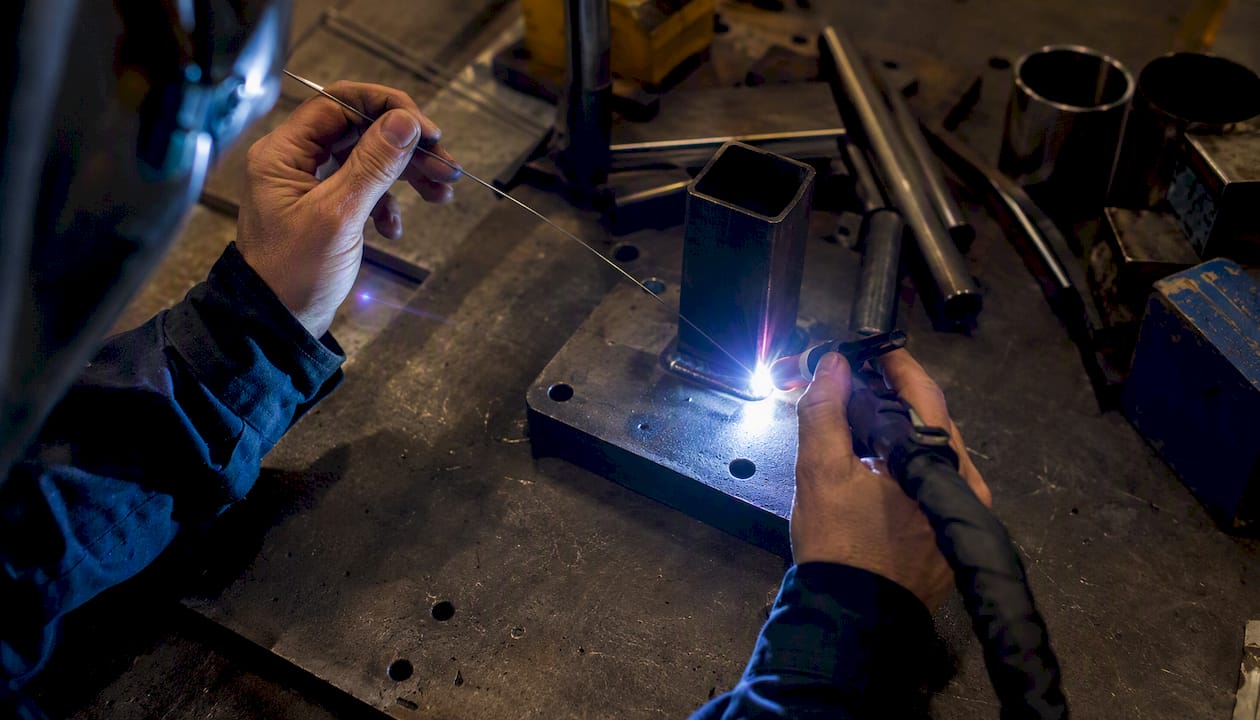
The result is a weld that looks like a stack of evenly spaced coins. Getting there takes real coordination: one hand holds the torch steady, the other feeds filler rod at a consistent rate, and your foot modulates the heat, all at the same time.
Essential TIG equipment:
- TIG welder with high-frequency start (AC/DC for aluminium)
- TIG torch, collet, and tungsten electrode
- Foot pedal amperage control
- Filler rods (matched to base metal)
- Pure argon or argon/helium shielding gas and regulator
- Welding helmet with appropriate shade, gloves, and jacket
Pro Tip: The biggest adjustment when moving from MIG to TIG is the foot pedal. Practice controlling amperage on scrap metal before you attempt a real joint. Many beginners burn through their first few pieces simply because they forget to ease off the pedal as the metal heats up.
What are the real advantages and disadvantages of each process?
MIG excels at speed and volume; TIG excels at precision and finish. Neither process is universally better. The right choice depends entirely on what you’re building and how the weld will be seen.
MIG pros and cons
Pros:
- Fast deposition rate; covers more weld per hour than TIG
- Easier to learn; most beginners produce acceptable welds within hours
- Works on thicker material without multiple passes
- Flux-core option removes the need for external shielding gas
- Lower equipment cost to get started
Cons:
- More spatter; visible welds often need grinding and cleanup
- Less precise on thin material; burn-through risk increases below 2 mm
- Not ideal for exotic alloys or food-grade stainless applications
- Shielding gas is disrupted easily outdoors
TIG pros and cons
Pros:
- Minimal spatter; welds are clean and often need no post-weld grinding
- Works on thin sections without burning through when technique is good
- Handles aluminium, copper, titanium, and other alloys that MIG struggles with
- Precise amperage control via foot pedal
- Produces the strongest, most aesthetic welds on thin stainless and aluminium
Cons:
- Slow; labour cost per foot of weld is significantly higher
- Steep learning curve; coordination takes weeks of deliberate practice
- Higher equipment cost; AC/DC machines for aluminium cost more
- Requires clean, well-prepped metal; contamination causes weld defects immediately
- No outdoor-friendly gasless option
Real-world examples:
- Auto-body repair: MIG for structural panels and frame sections; TIG for thin sheet metal patches where distortion and appearance matter.
- Steel furniture: MIG for the frame and structural joints; TIG for any exposed corner or decorative seam.
- Aluminium bike frames: TIG almost exclusively, because the tubing is thin and the welds are visible.
- Architectural railings: TIG for the visible posts and cap rail; MIG or tack welds for internal brackets.
Safety note: MIG produces more spatter and UV radiation from a wider arc cone, so a full-coverage helmet and fire-resistant clothing are non-negotiable. TIG produces less spatter but the tungsten electrode must be kept clean and sharp; a contaminated electrode causes arc wander and poor fusion. Both processes produce metal fumes — always weld in a ventilated space or use a fume extractor.
Which metals and thicknesses suit MIG or TIG?
The short rule: MIG for steel at 3 mm and above; TIG for anything thin, anything aluminium, and anything that needs a clean finish. Material type and gauge together determine which process gives you a reliable weld without excessive rework.
By material:
- Mild steel: Both processes work well. MIG is faster for structural and production work. TIG is better for thin-wall tubing or visible seams.
- Stainless steel: TIG is preferred for food-grade, pharmaceutical, and architectural applications where contamination and appearance matter. MIG works for structural stainless but requires careful gas selection.
- Aluminium: MIG with a spool gun handles aluminium at 3 mm and above reasonably well. TIG on AC current is the standard for thin aluminium and any application where the weld will be seen. Below 2 mm, TIG is the only practical choice for most welders.
- Copper, titanium, and exotic alloys: TIG is the standard. MIG is rarely used on these materials in professional settings.
By thickness:
- Under 1.5 mm: TIG only. MIG will burn through before a proper fusion occurs.
- 1.5 mm–3 mm: TIG preferred; MIG possible with careful settings and a skilled operator.
- 3 mm and above: MIG is the practical choice for speed. TIG is still an option for aesthetics but adds significant time.
Pro Tip: Welding aluminium with MIG requires a spool gun or a push-pull gun. Standard MIG drive rolls crush the soft aluminium wire. If your machine doesn’t support a spool gun, switch to TIG for aluminium work rather than fighting wire-feed problems all day.
Can you weld aluminium to steel?
Welding aluminium to steel directly is not a standard practice, and for good reason. The two metals have different melting points, different thermal expansion rates, and they form brittle intermetallic compounds at the fusion zone. A direct arc weld between aluminium and steel will almost always crack under load or thermal cycling.
When a structural connection between the two is genuinely needed, fabricators use transition inserts (bimetallic transition pieces that are explosion-welded at the factory) or mechanical fasteners. This is specialist work. If you’re facing an aluminium-to-steel joint on a real project, consult a certified fabricator rather than attempting a direct weld.
What are your shielding gas options, and can you weld outdoors?
TIG always requires inert shielding gas and has no gasless equivalent. MIG has a flux-core wire option that lets it run without external gas, which is the main reason MIG is more practical for outdoor work.
Common gas choices:
- Pure argon: Standard for TIG on all metals. Also used for MIG on aluminium. Provides a stable arc and clean bead.
- Argon/CO₂ mix (typically 75% Ar / 25% CO₂): The most common MIG gas for mild steel. CO₂ increases penetration and reduces cost; the argon component improves arc stability and reduces spatter.
- Pure CO₂: Cheaper than mixed gas; higher penetration but more spatter. Used for structural MIG work where finish is secondary.
- Argon/helium blends: Used in TIG for aluminium and stainless when extra heat input is needed. Helium raises arc voltage and speeds travel.
Typical flow rates run 10–20 litres per minute for most applications, adjusted up for larger cups or windy conditions.
Outdoor welding:
Wind is the enemy of shielding gas. Even a light breeze can blow the gas away from the weld pool fast enough to cause porosity, a condition where gas bubbles are trapped in the solidified weld and weaken it significantly. TIG is the most vulnerable because the gas coverage area is small and the arc is sensitive to contamination.
For outdoor MIG work, flux-core wire is the practical solution. The flux coating on the wire generates its own shielding as it burns, so wind has far less impact. For TIG outdoors, a windbreak is mandatory, and even then results are inconsistent.
Pro Tip: If you’re doing occasional outdoor repair work and don’t want to carry a gas cylinder, a flux-core MIG setup is the most portable and wind-tolerant option. Just expect more spatter and more cleanup than you’d get with gas-shielded wire.
How do speed, equipment, and costs compare in real numbers?
MIG is faster and cheaper per foot of weld. TIG is slower and more expensive per foot because of labour time and the cost of filler rods and tungsten electrodes. For a hobbyist or small shop, the machine cost difference is the first number that matters.
Ballpark entry-level setup costs (CAD, approximate ranges)
These are ballpark ranges for Canadian retail. Prices vary by brand, region, and whether you buy new or used. A multi-process machine (MIG/TIG/Stick) can reduce total outlay if you plan to use both processes.
Ongoing consumable costs:
- MIG wire: relatively low cost per kilogram; a spool lasts a long time for hobby use.
- TIG filler rods: sold by the kilogram or by the tube; cost is comparable to MIG wire but consumption is slower.
- Tungsten electrodes: last a long time if not contaminated; grinding and resharpening adds time.
- Shielding gas: both processes use similar volumes; TIG tends to use slightly less gas per hour because travel speed is slower.
- Post-weld cleanup: MIG requires more grinding and wire brushing on visible work; TIG typically needs little to none.
A multi-process machine makes sense for a hobbyist who wants to try both processes without buying two separate units. Most entry-level multi-process machines handle light MIG, TIG, and stick welding from a single chassis.
How long does it take to learn each process, and what does it pay?
MIG is easier to learn. A motivated beginner can produce structurally sound welds in flat position within a few sessions. TIG demands more from your hands, your feet, and your patience.
A practical learning path:
- Start with MIG on mild steel in flat position. Learn to set wire speed and voltage for consistent penetration.
- Practice all four positions: flat, horizontal, vertical, and overhead. Vertical and overhead are where most beginners struggle.
- Once MIG feels natural, move to TIG on mild steel. Focus on arc length and filler rod timing before adding the foot pedal.
- Introduce the foot pedal on scrap metal. Practice modulating heat without looking at the pedal.
- Move to aluminium TIG only after you’re comfortable with steel. Aluminium is less forgiving of technique errors.
- Seek formal instruction or certification. Community college welding programmes across Canada (including CÉGEP programmes in Quebec) offer structured courses that compress the learning curve significantly.
Pro Tip: An apprenticeship through the Iron Workers or Boilermakers unions in Canada gives you paid on-the-job training alongside formal certification. If you’re serious about welding as a trade, this path beats self-teaching by a wide margin.
On the compensation side, TIG specialists tend to command higher rates in professional settings because the process requires more skill and is standard in high-aesthetic and precision markets: aerospace, food processing, pharmaceutical, and architectural metalwork. MIG dominates high-volume fabrication and structural work, where throughput matters more than finish. Both are valuable skills; TIG simply takes longer to monetise.
Which process should you use for common projects?
Process-to-project quick rules:
- Steel fence or gate: MIG. Speed matters; welds are hidden or painted.
- Custom metal railing (visible, architectural): TIG for exposed seams; MIG for internal brackets.
- Auto-body panel repair: TIG for thin sheet; MIG for thicker structural sections.
- HVAC ductwork: MIG or spot welding; speed and airtightness matter more than aesthetics.
- Aluminium boat hull repair: TIG. Thin aluminium, structural integrity, and appearance all matter.
- Sculpture or decorative metalwork: TIG for fine detail; MIG for rough structure.
- Farm equipment repair: MIG. Thick steel, outdoor conditions, speed over finish.
Two real-world scenarios:
A fabricator building a custom steel staircase will typically tack the whole assembly with MIG first, checking alignment and fit before committing to full welds. Once the geometry is confirmed, the visible handrail and cap rail joints get TIG passes for a clean, grindable finish. The hidden structural welds stay as MIG. This hybrid workflow saves time without sacrificing the finish where it counts.
For thin-wall stainless tubing on a food-processing line, TIG is the only practical choice. The welds must be smooth, crevice-free, and sanitary. MIG spatter and the rougher bead profile create contamination traps that fail food-safety inspections.
The practical rule most shops follow: use MIG where the weld will never be seen or where speed is the priority; use TIG where the weld will be visible, where the metal is thin, or where the application demands it. Mixing both in a single project is common and often the most efficient approach.
How does a Greater Montreal shop choose between TIG and MIG?
Local fabrication shops pick their process based on the same logic as any professional operation, but the specific mix of projects shapes which process gets used most. Manaracorp’s welding services in Greater Montreal cover both MIG and TIG across a range of materials: steel, stainless steel, aluminium, and copper.
For structural work like HVAC ductwork and steel framing, MIG is the workhorse. It covers ground quickly and produces welds that are strong, consistent, and appropriate for the application. For custom metal railings and architectural staircases, TIG is the standard for any seam that will be seen by the client. The difference in finish quality is immediately visible, and clients notice.
How process selection plays out locally:
- Rectangular and spiral HVAC ductwork: MIG and spot welding for speed and airtightness.
- Custom steel and stainless railings: TIG for cap rail joints and visible post connections; MIG for internal brackets and structural welds.
- Aluminium components: TIG on AC current for thin sections; MIG with spool gun for heavier aluminium.
- Onsite welding (installation work): MIG and flux-core MIG for field conditions where gas shielding is impractical.
Manaracorp fabricates and installs all work locally within Greater Montreal, including the island, Laval, the South Shore, and the West Island. For readers who want to understand more about how professional shops approach welding technique and finish selection, the welding techniques guide on the Manaracorp site covers this in more depth.
What fabricators actually choose, and why
Most experienced fabricators will tell you the same thing: MIG is the process you use when you need to get it done, and TIG is the process you use when it needs to look right. That’s not a knock on MIG. A well-set MIG weld on structural steel is strong, reliable, and exactly what the job calls for. But when a client is going to run their hand along a stainless railing or look closely at an aluminium joint, MIG’s spatter and bead profile simply don’t hold up to scrutiny.
The real constraint in a working shop is time. TIG takes longer, and that time costs money. For most structural and production work, that cost isn’t justified. For visible architectural work, it almost always is. The projects that genuinely benefit from TIG are the ones where the weld is part of the finished surface, not hidden inside it.
When should you hire Manaracorp for welding work in Greater Montreal?
Hire a professional welder when the weld is structural, when it will be visible, when the material is aluminium or stainless, or when you simply don’t have the time or equipment to do it right.
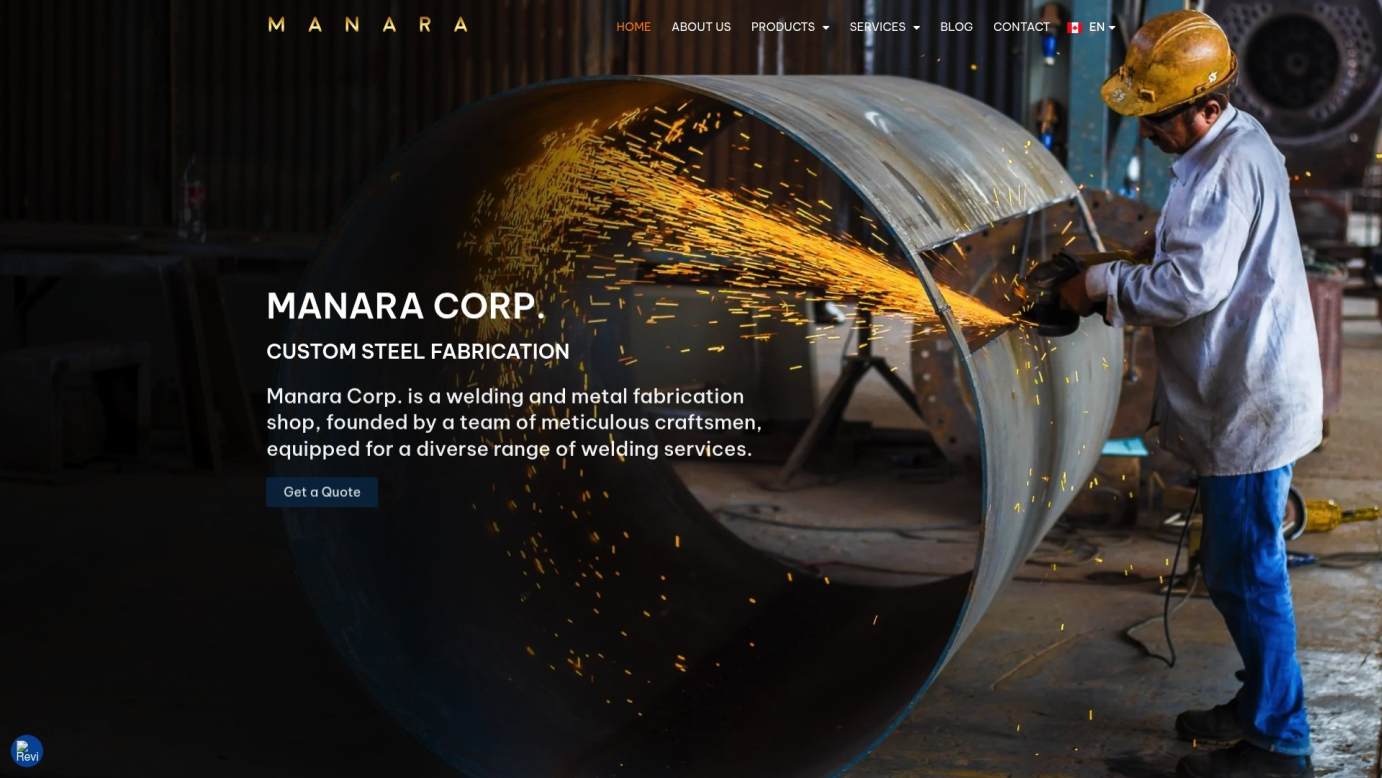
Manaracorp handles both MIG and TIG work across Greater Montreal, from HVAC ductwork and steel fencing to architectural railings and custom staircases. The shop fabricates everything in-house in Lachine and installs locally.
Relevant services:
- Professional welding services for steel, stainless, aluminium, and copper, including onsite welding.
- Custom metal railings fabricated and installed across Greater Montreal.
- High-quality commercial welding for industrial and contractor clients.
- CNC laser cutting, sheet bending, and profile rolling for complete fabrication packages.
To request a quote or discuss your project, contact Manaracorp directly through the welding services page. The shop serves the island of Montreal, Laval, the South Shore, and the West Island, in both French and English.
Useful sources
- MIG vs TIG Welding: What Is the Difference? (TWI) — Technical primer on GMAW and GTAW process definitions, gas choices, and application guidance.
- MIG vs TIG Welding: Key Differences, Pros, Cons, and When to Use Each (Modern Welding) — Practical comparison of strengths, weaknesses, and typical use cases.
- TIG Welding vs MIG Welding: How to Choose the Right Process (Modern Welding) — Focused guide on shielding gas requirements and outdoor suitability.
- MIG vs. TIG Welding: What’s the Difference? (BobVila) — Beginner-friendly overview with learning curve and equipment guidance.
- Welding Services in Montreal (Manaracorp) — Local service page for professional MIG and TIG welding across Greater Montreal.
FAQ
Which is better for a beginner, MIG or TIG welding?
MIG is better for beginners. Most welding instructors recommend starting with MIG because the machine handles wire feed and most variables automatically, letting you focus on technique before adding the complexity of TIG’s two-handed, foot-pedal coordination.
Can you TIG weld without shielding gas?
No. TIG always requires inert shielding gas, typically pure argon or an argon/helium blend. There is no flux-core or self-shielding equivalent for TIG, which is why MIG is the more practical choice for outdoor or field welding.
Which process produces a stronger weld, MIG or TIG?
Weld strength depends more on technique, joint preparation, and material match than on the process itself. TIG tends to produce cleaner, more consistent welds on thin sections and exotic alloys, while MIG delivers strong, reliable welds on thicker structural steel. Neither process is categorically stronger.
Do TIG welders earn more than MIG welders?
Experienced TIG welders often command higher rates because the process requires more skill and is standard in precision markets like aerospace, food processing, and architectural metalwork. MIG dominates high-volume structural fabrication, where throughput is the priority.